Love this? Save it for later!
Share the inspiration with your friends
“I wasn’t planning to get crafty that afternoon,” I admit, “but then my phone buzzed with a last-minute text from Ellie, my neighbor’s teenage daughter.” It was the day before her high school graduation party, and she was in full panic mode. She needed easy, fun, and crowd-pleasing snacks—fast. I rummaged through my pantry and spotted a dusty box of Rice Krispies. That’s when the idea hit me: why not make Easy Graduation Cap Rice Krispie Treat Pops with Dark Chocolate Coating?
Honestly, the idea of turning classic Rice Krispie treats into little graduation caps seemed a bit whimsical, maybe even a little over the top. But hey, I figured if a last-minute snack can look this sharp and taste fantastic, why not? I whipped up a batch in under an hour, and Ellie’s party was the talk of the block. Everyone loved the crunchy, chewy texture paired with that bittersweet dark chocolate shell. Plus, you know that satisfying crack when you bite through the chocolate? Yeah, that.
Maybe you’ve been there—scrambling for something sweet that’s easy enough to make when you’re juggling a million things. These pops were a lifesaver, and the best part? They look like you put way more effort into them than you actually did. I mean, I forgot to bring out the parchment paper on my first try, which made a bit of a mess (classic me), but otherwise, this recipe stuck with me. It’s perfect for graduation celebrations, and let me tell you, it’s a total crowd-pleaser.
Why You’ll Love This Recipe
- Quick & Easy: These treats come together in under 45 minutes, making them perfect for last-minute party prep.
- Simple Ingredients: You probably have everything on hand—Rice Krispies, marshmallows, butter, and dark chocolate.
- Perfect for Graduation Parties: The clever graduation cap design adds a fun and festive touch that guests will remember.
- Crowd-Pleaser: Both kids and adults rave about these pops, thanks to the delightful crunch and chocolate coating.
- Unbelievably Delicious: The chewy Rice Krispie base contrasts beautifully with the rich, slightly bitter dark chocolate shell.
What sets this recipe apart is the simple technique of shaping the treats into perfect little squares and topping them with a chocolate-coated “tassel” made from candy or licorice. It’s not just a snack; it’s a mini celebration in every bite. I’ve tested versions with milk chocolate, but honestly, the dark chocolate adds that sophisticated depth of flavor that makes these treats feel special without any extra fuss.
This recipe isn’t just about making a sweet treat; it’s about turning a classic into something memorable for graduates and their guests. Whether you’re a seasoned home baker or someone who usually sticks to boxed snacks, these pops make you feel like a pro with minimal effort.
Ingredients Needed
This recipe uses simple, pantry-friendly ingredients to deliver a nostalgic yet festive treat that’s both chewy and crunchy. If you want to customize, I’ll toss in substitution tips along the way.
- For the Rice Krispie Treat Base:
- 6 cups Rice Krispies cereal (or any crispy rice cereal)
- 4 cups mini marshmallows (about 10 ounces)
- 3 tablespoons unsalted butter (plus extra for greasing)
- 1 teaspoon vanilla extract (optional, adds a warm note)
- For the Dark Chocolate Coating:
- 12 ounces dark chocolate chips or chopped dark chocolate (I prefer 60-70% cacao for balance)
- 1 tablespoon coconut oil or vegetable oil (helps the chocolate shine and harden smoothly)
- For Decoration (Graduation Caps):
- Black licorice strings or black candy melts for the tassels
- Mini square-shaped candies or thin pretzel sticks for the cap’s mortarboard button
If you’re gluten-free, most plain Rice Krispies are safe but double-check the box to be sure. You can swap mini marshmallows with vegan marshmallows if needed. For a dairy-free version, use vegan butter or coconut oil instead of unsalted butter. The dark chocolate can be replaced with semi-sweet if you prefer a sweeter finish, but I recommend sticking with dark chocolate to keep it balanced.
Equipment Needed
- Large mixing pot or microwave-safe bowl for melting marshmallows and butter
- Large mixing bowl
- Spatula (preferably silicone for easy mixing and scraping)
- Baking sheet lined with parchment paper or a silicone baking mat
- Sharp knife or bench scraper for cutting the Rice Krispie treats
- Microwave-safe bowl or double boiler for melting chocolate
- Wooden skewers or lollipop sticks for the pops
- Cooling rack (optional, but helpful for setting the chocolate coating)
If you don’t have a double boiler, a microwave works just fine—just heat the chocolate in short bursts to avoid burning. I’ve tried using a plastic knife for cutting, but a sharp metal knife gives cleaner edges. For budget-friendly tools, parchment paper is a must-have here to prevent sticking and messy cleanups.
Preparation Method
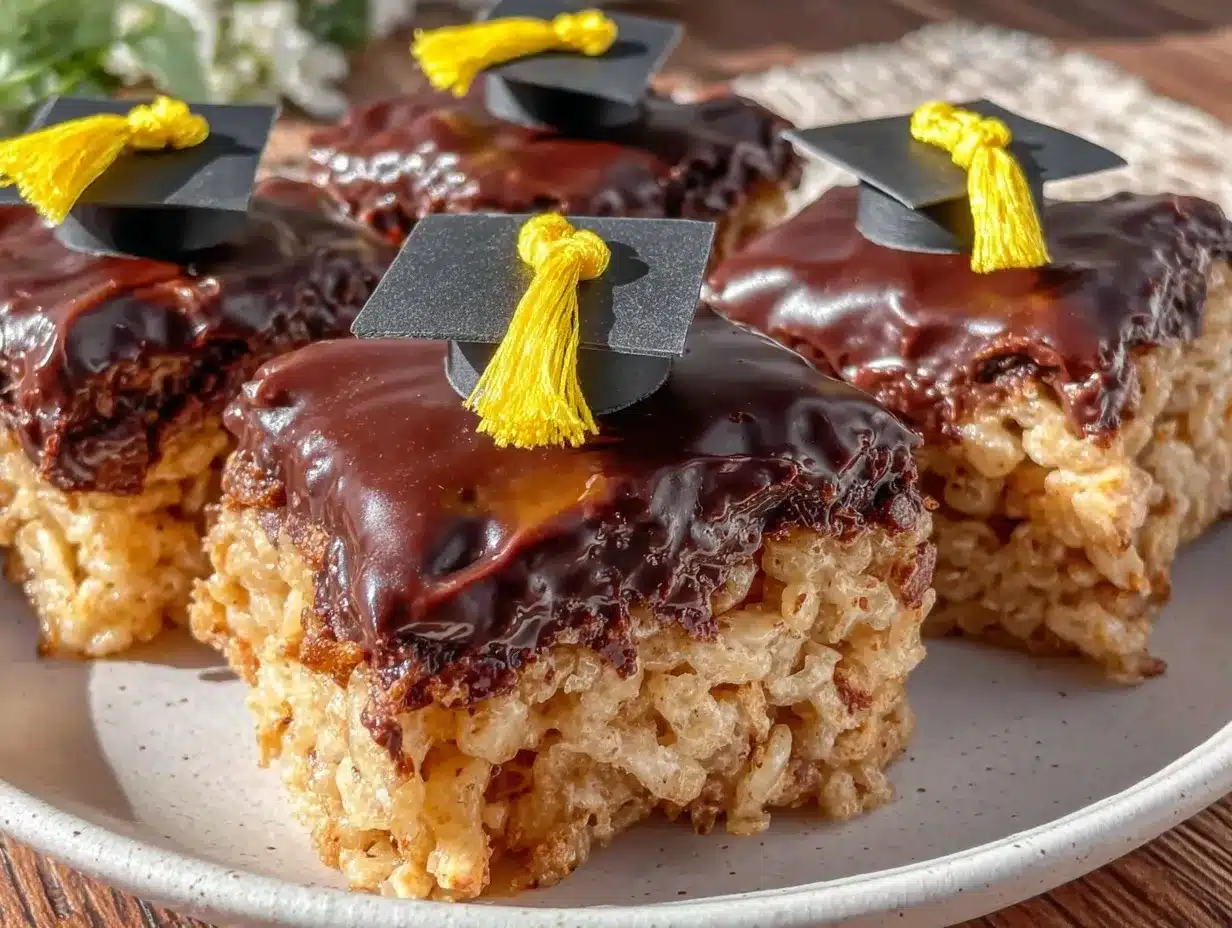
- Prepare Your Workspace: Grease a 9×13-inch baking pan with butter or line it with parchment paper. This helps the Rice Krispie treats release easily later.
- Melt Butter and Marshmallows: In a large pot over low heat, melt 3 tablespoons unsalted butter. Add 4 cups mini marshmallows and stir constantly until completely melted and smooth (about 5 minutes). Alternatively, melt in the microwave in 30-second intervals, stirring in between.
- Add Vanilla Extract: Remove from heat and stir in 1 teaspoon vanilla extract for extra flavor. This step is optional but highly recommended.
- Mix in Cereal: Immediately add 6 cups Rice Krispies cereal to the melted marshmallow mixture. Stir gently but thoroughly until the cereal is evenly coated. Work quickly before it cools and sets.
- Press into Pan: Transfer the mixture to your prepared pan. Using a buttered spatula or your hands (lightly buttered, so it doesn’t stick), press the mixture evenly into the pan about 1-inch thick. Don’t press too hard or the treats will be dense instead of chewy.
- Cool and Cut: Let the mixture cool and set for about 30 minutes at room temperature. Once firm, carefully cut into 12 equal squares with a sharp knife.
- Insert Sticks: Gently insert a wooden skewer or lollipop stick into each square about halfway through. Place them on parchment paper to prepare for dipping.
- Melt Chocolate Coating: In a microwave-safe bowl or double boiler, melt 12 ounces of dark chocolate chips with 1 tablespoon coconut or vegetable oil. Stir until smooth and glossy.
- Dip the Pops: Holding the stick, dip each Rice Krispie square into the melted chocolate, coating it completely or just the top part—your choice! Tap off excess chocolate and set on parchment paper to harden.
- Add Graduation Cap Decorations: While the chocolate is still wet, place a small square candy or piece of pretzel in the center of the top for the mortarboard button. Use a short piece of black licorice or melted black candy to create a tassel hanging off the side.
- Let Set Completely: Allow the chocolate to harden fully at room temperature, or chill in the fridge for 10–15 minutes if you’re impatient.
Tip: If the chocolate starts to thicken before you finish dipping, rewarm it gently. Also, don’t rush pressing the cereal mixture into the pan; too much pressure makes the treats tough. I once pressed so hard that my first batch was more like Rice Krispie bricks—lesson learned!
Cooking Tips & Techniques
For the best Rice Krispie treats, timing is everything. Melt the marshmallows slowly on low heat to prevent scorching, which can give a burnt flavor. Use a silicone spatula to scrape the pot clean and mix evenly, so no sticky pockets remain.
When pressing the mixture into your pan, a buttered spatula works wonders to avoid sticking, but don’t overdo it—light, even pressure keeps the treats chewy rather than dense. Also, cutting the treats while fully cooled helps maintain clean edges; warm treats tend to crumble or stick.
Melting chocolate can be tricky. I always add a bit of coconut oil—it keeps the chocolate shiny and easier to coat smoothly. If you don’t have coconut oil, vegetable oil works fine too. Avoid overheating the chocolate to prevent graininess.
One common mistake is inserting sticks too early before the treats set, which can cause them to fall apart. Let the treats cool and firm up a bit before adding sticks, but not so long they become brittle. This balance makes for sturdy, easy-to-handle pops.
Multitasking tip: While the treats are setting, melt your chocolate and prepare decorations. When it’s time to dip, everything will be ready and you can move quickly before the chocolate cools.
Variations & Adaptations
- Flavor Variations: Add a teaspoon of almond or peppermint extract to the marshmallow mixture for a festive twist. Swap out dark chocolate for white chocolate with food coloring to match school colors.
- Dietary Adaptations: Use gluten-free crispy rice cereal and vegan marshmallows to make the recipe allergy-friendly. Substitute dairy-free butter and use dairy-free chocolate chips for a vegan version.
- Seasonal Twists: For spring or summer graduations, mix in some edible glitter or sprinkle colored sugar on the chocolate before it sets. Alternatively, mix mini chocolate chips or chopped nuts into the Rice Krispie base for added texture.
- Cooking Method Adjustments: Instead of wooden sticks, you can serve the treats as bite-sized squares with a tiny candy tassel on top for an easier no-stick version.
Personally, I tried adding a pinch of cinnamon to the marshmallow mix once—it gave a cozy warmth that surprised me in a good way. You might find your own favorite spin once you play around with this recipe!
Serving & Storage Suggestions
Serve these pops at room temperature for the best chewy texture and crisp chocolate shell. They make excellent finger food for graduation parties, paired with sparkling lemonade or iced tea.
If you want to jazz up your display, arrange them upright in a foam block covered with decorative paper to resemble a mini graduation “bouquet.” Kids especially love the visual!
Store leftovers in an airtight container at room temperature for up to 3 days. If your house is warm, pop them in the fridge to keep the chocolate from melting, but this might make the treats a bit firmer.
To reheat slightly, let chilled pops sit at room temperature for 10 minutes before serving. Avoid microwaving or they might get soggy.
Flavors tend to meld nicely after a day, so these treats can be made a day ahead, making your party prep less stressful.
Nutritional Information & Benefits
Each Rice Krispie treat pop contains approximately:
| Calories | 150-180 kcal |
|---|---|
| Carbohydrates | 28g |
| Fat | 5g |
| Protein | 1g |
| Sugar | 17g |
While these pops are definitely a treat, they contain simple ingredients and no artificial flavors or preservatives. Dark chocolate offers antioxidants and a richer flavor with less sugar than milk chocolate. Using real butter and quality marshmallows helps avoid overly processed alternatives.
This recipe can fit into most balanced diets when enjoyed in moderation. If you need gluten-free or vegan snacks, the suggested substitutions make this recipe accessible without sacrificing taste.
Conclusion
This Easy Graduation Cap Rice Krispie Treat Pops with Dark Chocolate Coating recipe is a fun and fuss-free way to celebrate big milestones. Whether you’re scrambling last-minute or planning ahead, these treats bring a festive flair that’s sure to impress.
Feel free to make these your own! Swap flavors, colors, or decorations to match your party theme or personal taste. I still find myself reaching for this recipe whenever I want a sweet, nostalgic snack with a grown-up twist.
If you give this a try, drop a comment below and tell me how your pops turned out—or share your own creative variations! I love hearing from fellow home bakers who make these treats part of their celebrations.
Here’s to sweet memories and delicious moments—happy graduation snacking!
FAQs
Can I use a different cereal instead of Rice Krispies?
Yes! You can use any crispy rice cereal or similar puffed cereal, but keep in mind the texture might vary slightly. Some cereals are denser or sweeter, which can affect the final chewiness.
How do I store these Rice Krispie treat pops to keep them fresh?
Store them in an airtight container at room temperature for up to 3 days. If it’s warm, refrigerate but allow them to come to room temperature before serving for the best texture.
Can I make these pops without sticks?
Absolutely! You can cut them into bite-sized squares and decorate with candy tassels on top for a no-stick version. Just adjust the decoration method accordingly.
What’s the best way to melt chocolate for coating?
Use a microwave in short bursts of 20-30 seconds, stirring in between, or melt chocolate gently over a double boiler. Adding a bit of coconut or vegetable oil helps achieve a smooth, shiny finish.
Can I prepare these Rice Krispie treats ahead of time?
Yes! You can make the Rice Krispie base a day in advance and store it wrapped tightly. Assemble and coat with chocolate on the party day for the freshest results.
Pin This Recipe!
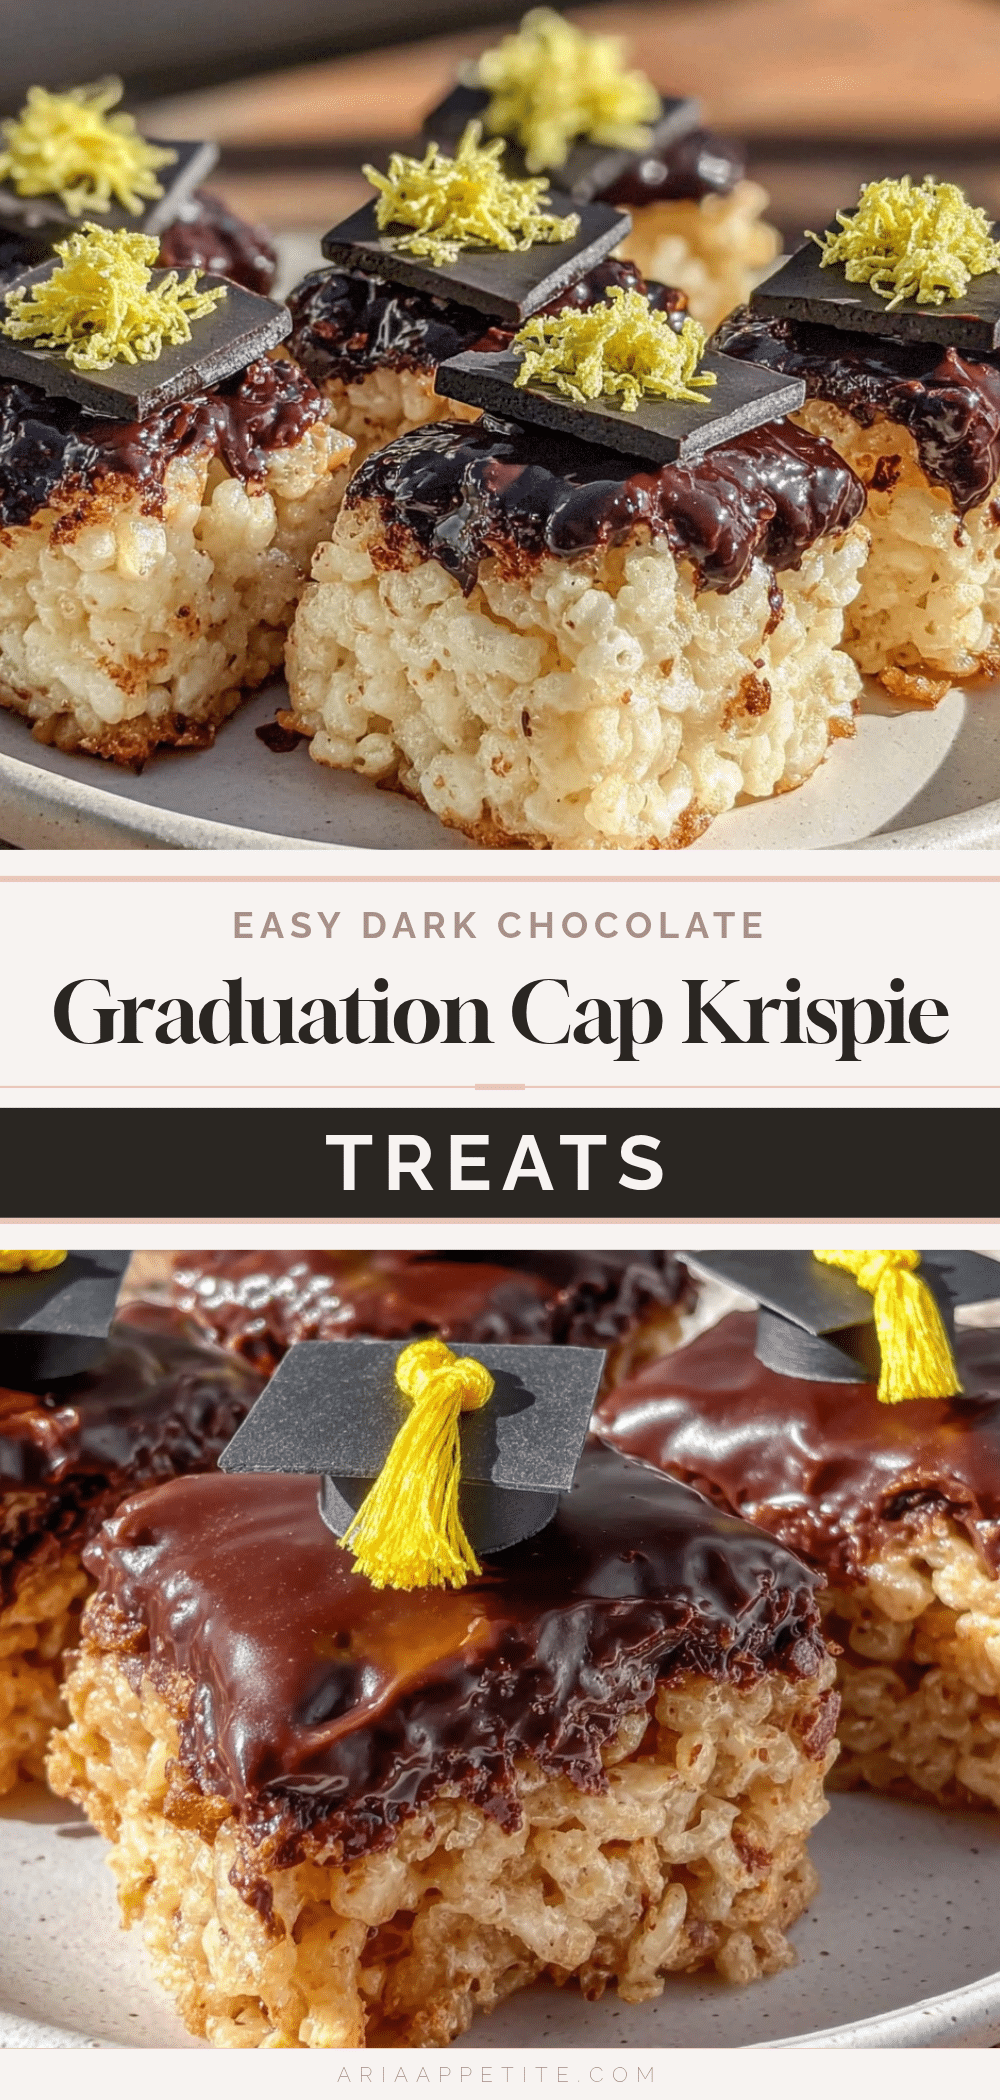
Easy Graduation Cap Rice Krispie Treat Pops with Dark Chocolate Coating

These fun and festive Rice Krispie Treat Pops are shaped like graduation caps and coated in rich dark chocolate, perfect for last-minute party snacks that impress.
- Prep Time: 15 minutes
- Cook Time: 30 minutes
- Total Time: 45 minutes
- Yield: 12 pops 1x
- Category: Dessert
- Cuisine: American
Ingredients
- 6 cups Rice Krispies cereal (or any crispy rice cereal)
- 4 cups mini marshmallows (about 10 ounces)
- 3 tablespoons unsalted butter (plus extra for greasing)
- 1 teaspoon vanilla extract (optional)
- 12 ounces dark chocolate chips or chopped dark chocolate (60-70% cacao preferred)
- 1 tablespoon coconut oil or vegetable oil
- Black licorice strings or black candy melts for tassels
- Mini square-shaped candies or thin pretzel sticks for mortarboard button
Instructions
- Grease a 9×13-inch baking pan with butter or line it with parchment paper.
- In a large pot over low heat, melt 3 tablespoons unsalted butter. Add 4 cups mini marshmallows and stir constantly until melted and smooth (about 5 minutes). Alternatively, melt in the microwave in 30-second intervals, stirring in between.
- Remove from heat and stir in 1 teaspoon vanilla extract (optional).
- Immediately add 6 cups Rice Krispies cereal to the melted marshmallow mixture. Stir gently but thoroughly until evenly coated.
- Transfer mixture to prepared pan. Using a buttered spatula or lightly buttered hands, press mixture evenly into pan about 1-inch thick without pressing too hard.
- Let cool and set for about 30 minutes at room temperature. Once firm, cut into 12 equal squares with a sharp knife.
- Gently insert a wooden skewer or lollipop stick halfway into each square. Place on parchment paper.
- Melt 12 ounces dark chocolate chips with 1 tablespoon coconut or vegetable oil in microwave-safe bowl or double boiler until smooth and glossy.
- Dip each Rice Krispie square into melted chocolate, coating completely or just the top. Tap off excess chocolate and set on parchment paper to harden.
- While chocolate is wet, place a small square candy or pretzel piece in center for mortarboard button. Use short piece of black licorice or melted black candy to create tassel hanging off side.
- Allow chocolate to harden fully at room temperature or chill in fridge for 10–15 minutes.
Notes
Use a buttered spatula or hands to press mixture lightly to keep treats chewy. Melt chocolate with coconut or vegetable oil for shine and smooth coating. Let treats cool before inserting sticks to avoid breaking. Rewarm chocolate gently if it thickens during dipping. Store in airtight container at room temperature up to 3 days or refrigerate if warm.
Nutrition
- Serving Size: 1 pop
- Calories: 150180
- Sugar: 17
- Fat: 5
- Carbohydrates: 28
- Protein: 1
Keywords: Rice Krispie treats, graduation snacks, party treats, dark chocolate, easy dessert, no bake, kids snacks


