Love this? Save it for later!
Share the inspiration with your friends
Three autumn Saturdays ago, I found myself stuck in a tiny kitchen with a power outage, the hum of the city replaced by the quiet crackle of candles. I was craving something warm, crispy, and just a bit indulgent to start the day right. I had a bag of frozen hash browns, a carton of eggs, and a handful of fresh chives from my windowsill garden. It reminded me of a little café I used to visit near the waterfront—Cooper’s Nook—a place that made the most unforgettable crispy baked eggs in hash brown nests. When it closed suddenly last year, honestly, I felt a pang of loss every weekend morning.
After about five attempts, some burnt edges, a stray egg yolk disaster, and a kitchen mess that would make a food stylist wince, I finally nailed it. This recipe isn’t just about breakfast—it’s about recreating that cozy, flaky crunch and the gentle oniony pop of fresh chives that made Cooper’s Nook mornings special. Maybe you’ve been there, chasing a dish that vanished from your life—and if so, I get it. This crispy baked eggs in hash brown nests recipe brings that kind of joy back to the table, without any fuss or fancy ingredients.
Let me tell you, this recipe stayed with me not because it’s complicated, but because it strikes that perfect balance of indulgence and wholesomeness. It’s the kind of breakfast that makes you want to slow down, savor the moment, and maybe even invite a neighbor over to share. So, if you’re ready to get a little crispy, a bit gooey, and totally satisfied, this one’s for you.
Why You’ll Love This Recipe
This crispy baked eggs in hash brown nests recipe is one I’ve tested in different kitchens, on rushed mornings and lazy weekends alike. It works every time, and here’s why it’ll probably become a favorite in your house too:
- Quick & Easy: Ready in under 30 minutes, it’s perfect for busy mornings or when you want something fuss-free but impressive.
- Simple Ingredients: You won’t need a specialty store run—hash browns, eggs, and fresh chives are probably in your fridge or freezer already.
- Perfect for Everyday Meals: Whether it’s a weekday breakfast or a weekend brunch, this recipe fits right in with your health-minded but flavor-loving routine.
- Crowd-Pleaser: Kids, adults, and even the pickiest eaters tend to ask for seconds—crispy edges with soft yolks are just irresistible.
- Unbelievably Delicious: The contrast of textures—the crunch of hash browns, the silky egg, and the fresh zing of chives—makes for a satisfying bite every time.
What sets this recipe apart is the little technique I learned from trial and error: pressing the hash browns firmly into muffin tins to get that perfect nest shape and baking at just the right temperature so the nests crisp without drying out. Plus, sprinkling fresh chives on top adds that fresh, bright note that honestly makes all the difference. This isn’t just any baked eggs dish—it’s a recipe that feels both indulgent and thoughtful, fitting right into a lifestyle where you want to eat well without feeling like you’re missing out.
What Ingredients You Will Need
This recipe uses simple, wholesome ingredients to deliver bold flavor and satisfying texture without the fuss. Most are pantry or freezer staples, with fresh chives adding a lovely seasonal touch.
- Frozen shredded hash browns – about 4 cups (roughly 340g), thawed and patted dry (I recommend the store brand from Trader Joe’s for best crispiness)
- Eggs – 6 large, preferably free-range or organic for richer flavor
- Fresh chives – 2 tablespoons, finely chopped (adds a mild onion flavor and vibrant color)
- Olive oil or avocado oil – 2 tablespoons, for coating the muffin tins (use avocado oil if you want a neutral flavor)
- Salt – 1 teaspoon, or to taste
- Freshly ground black pepper – ½ teaspoon
- Smoked paprika – ¼ teaspoon (optional, for a subtle smoky note)
- Grated Parmesan cheese – ¼ cup (about 25g, optional, adds a savory dimension)
If you want to swap ingredients, almond flour can be added to the hash browns for extra binding (helpful if your hash browns are very loose). Greek yogurt or a dollop of sour cream on the side is a nice finishing touch but totally optional. For dairy-free, leave out the Parmesan or use a plant-based alternative.
Equipment Needed
- Muffin tin – A standard 12-cup muffin pan is perfect for shaping the nests. If you don’t have one, small oven-safe ramekins work too but the nests won’t be as uniform.
- Mixing bowls – At least one medium bowl for combining hash browns and seasonings.
- Non-stick spray or brush – For greasing the muffin tins to prevent sticking. I like using a silicone brush with avocado oil for even coating.
- Spatula or spoon – To press the hash browns into the tins firmly.
- Sharp knife – For chopping the fresh chives finely.
- Oven mitts – Definitely important to avoid burns when handling hot tins!
Personally, I’ve tried using silicone muffin cups in a baking tray, and while cleanup is easier, the nests don’t crisp up as well. A metal muffin tin really gives that golden, crunchy crust. If you’re on a budget, a simple muffin tin can be found at most dollar stores or thrift shops, and a little seasoning goes a long way for maintenance.
Preparation Method
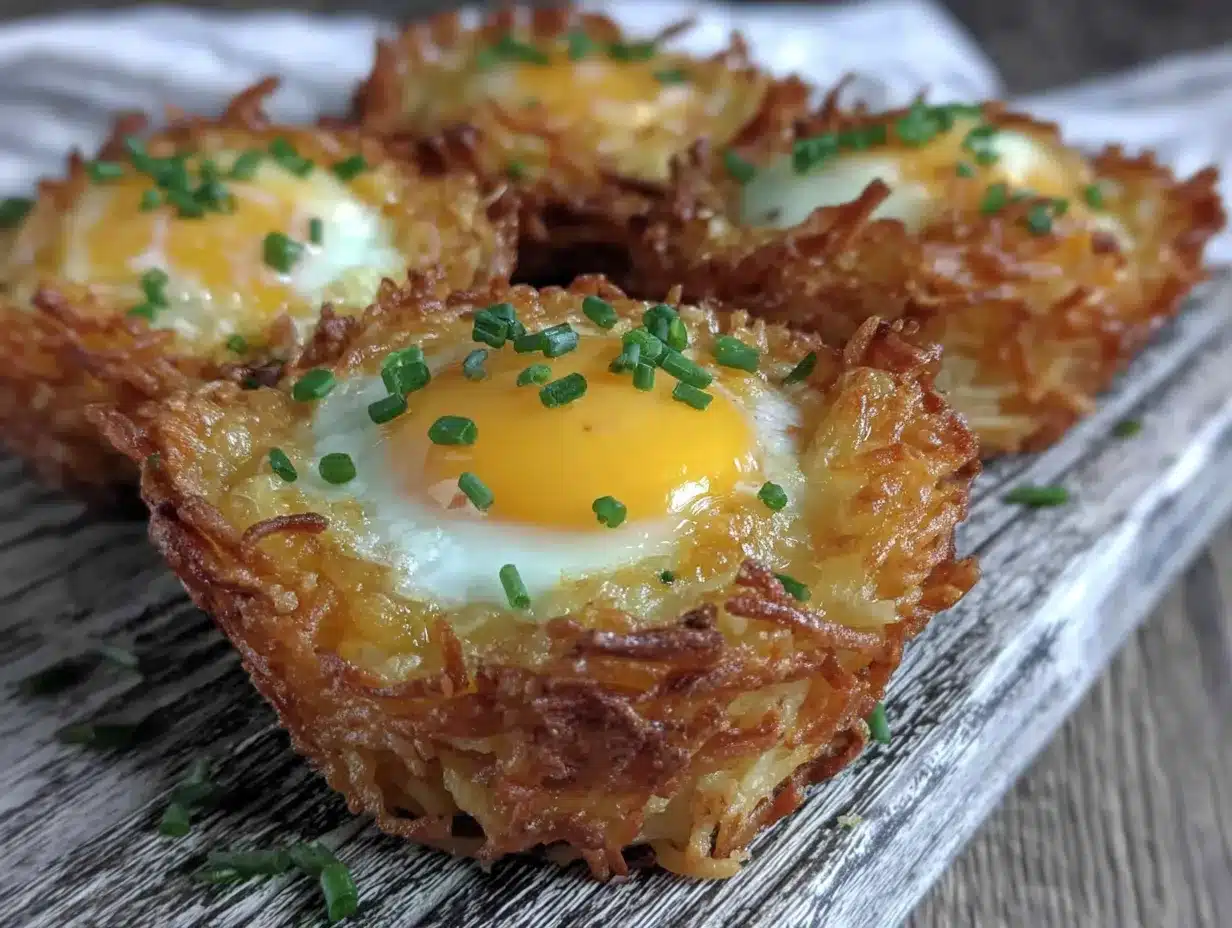
- Preheat your oven to 400°F (200°C). This temperature crisps the hash browns without overcooking the egg inside. Grease your muffin tin generously with olive or avocado oil to encourage browning and easy removal. (5 minutes)
- Prepare the hash brown mixture: In a medium bowl, combine the thawed and well-drained hash browns with salt, pepper, smoked paprika (if using), and grated Parmesan. Toss gently until evenly mixed. Be sure to press out extra moisture from the hash browns beforehand—too wet and the nests won’t crisp properly. (5 minutes)
- Form the nests: Spoon a generous amount of hash browns into each muffin cup, about ⅓ cup (approximately 40g). Using the back of a spoon or your fingers, press the hash browns firmly against the sides and bottom to create a hollow center—the nest shape. This step is key for that satisfying crunch and holding your egg. (10 minutes)
- Bake the nests for 15 minutes until the edges start turning golden and crisp. This pre-baking step helps set the structure so the egg doesn’t make the nests soggy. You’ll see the edges firming up and the aroma of toasted potatoes filling your kitchen. (15 minutes)
- Remove the muffin tin carefully, then crack one egg into each hash brown nest. Try to keep the yolk intact for that gooey center. Return the tin to the oven and bake for an additional 10-12 minutes, or until the egg whites are set but the yolks are still slightly runny. (10-12 minutes)
- Finishing touches: Once baked, remove the nests from the oven and sprinkle generously with fresh chopped chives. The heat will gently release their flavor and add a fresh pop of color. Let the nests cool for a couple of minutes in the tin before gently lifting them out with a butter knife or small spatula. (5 minutes)
Pro tip: If you like your yolks fully cooked, leave the nests in the oven for a few minutes longer, but keep an eye to avoid over-drying the hash browns. Also, don’t overcrowd the muffin tin in the oven to allow even heat circulation.
Cooking Tips & Techniques
Cooking crispy baked eggs in hash brown nests can be deceptively simple, but a few tricks make all the difference.
- Dry those hash browns well: Excess moisture is the enemy of crispiness. After thawing, I always wrap them in a clean kitchen towel and squeeze out as much water as possible. This habit took me from soggy nests to perfectly crunchy ones.
- Press firmly: Don’t be shy about packing the hash browns tightly in the muffin cups. Loose nests tend to fall apart when you remove them, and trust me, nobody wants to scoop messy potato bits off their plate.
- Oven temperature matters: 400°F (200°C) is the sweet spot for browning the potatoes and cooking the eggs without drying them out. Lower temps leave you waiting forever, higher temps risk burning before the eggs cook through.
- Timing the eggs: Crack the eggs in after the nests have partially baked. If you add them too early, the whites can overcook and become rubbery, or the nests might get soggy from the raw egg moisture.
- Use fresh eggs: Fresh eggs hold their shape better and taste fresher. Older eggs tend to spread out more, which makes a messier nest.
- Multitasking tip: While the nests are baking, chop your chives and set the table. Trust me, it makes the whole process feel smoother and less frantic.
Variations & Adaptations
You can easily tweak this recipe to fit different dietary needs or flavor cravings.
- Vegetarian boost: Add diced bell peppers, spinach, or sautéed mushrooms mixed into the hash browns before baking. It adds color and nutrition without complicating the recipe.
- Gluten-free option: Ensure your hash browns are gluten-free (most are, but check labels) and swap Parmesan for a dairy-free cheese or nutritional yeast for a cheesy flavor without dairy.
- Spicy kick: Mix in a pinch of cayenne pepper or chopped jalapeños with the hash browns for some heat. Top with a dollop of Greek yogurt or sour cream to balance the spice.
- Alternate cooking method: Tried these in an air fryer at 375°F (190°C) for 12 minutes pre-bake and 8 minutes after adding eggs. The nests crisp up beautifully, and cleanup is a breeze.
- Personal twist: I once swapped fresh chives for chopped fresh dill and added a sprinkle of smoked salmon bits on top—delicious and fancy-feeling for a special weekend brunch.
Serving & Storage Suggestions
Serve these nests warm, right out of the oven, for the best crispy-soft contrast. They pair wonderfully with a light salad or fresh fruit to keep the meal balanced and refreshing. I love serving them alongside a cup of green tea or a freshly pressed juice to keep things bright and wholesome.
If you have leftovers (which can be rare!), cool them completely before storing in an airtight container in the refrigerator for up to 2 days. Reheat gently in a toaster oven or regular oven at 350°F (175°C) for 5-7 minutes to bring back the crispiness. Microwave reheating tends to make the hash browns soggy, so I avoid that.
The flavors deepen if you make the nests a few hours ahead and let them rest at room temperature before baking—just cover loosely with foil to keep from drying out.
Nutritional Information & Benefits
This crispy baked eggs in hash brown nests recipe balances indulgence with mindful ingredients. Each serving (2 nests) roughly contains:
| Nutrient | Amount |
|---|---|
| Calories | 280-320 kcal |
| Protein | 14g |
| Carbohydrates | 20g |
| Fat | 18g |
| Fiber | 2g |
Eggs provide high-quality protein and essential vitamins like B12 and D, while potatoes are a good source of potassium and fiber, especially with the skins on in some hash browns. Fresh chives add antioxidants and vitamin K. This recipe fits nicely into gluten-free and low-sugar diets, and swapping oils or cheese can adapt it for dairy-free needs. From a wellness perspective, it’s a satisfying meal that supports energy without feeling heavy or greasy.
Conclusion
If you’re looking for an easy, flavorful breakfast that feels special without complicated steps or ingredients, this crispy baked eggs in hash brown nests recipe is a keeper. It’s the kind of dish that makes you slow down, savor each bite, and maybe even smile at the memory of a little café that’s gone but not forgotten.
Feel free to customize it—add your favorite veggies, swap cheeses, or change up the herbs. The basics stay the same: crispy, cozy, and fresh. I keep making this recipe because it turns simple pantry staples into something that feels like a treat, not a compromise. I hope you enjoy it as much as I do.
Let me know how your nests turn out, any twists you try, or if you have a favorite twist on baked eggs. Sharing these little kitchen wins keeps the joy alive!
FAQs
Can I make these hash brown nests ahead of time?
Yes! You can prepare the hash brown nests up to a day in advance and keep them covered in the fridge. Just bake them partially before adding eggs and finish baking when ready to serve.
What’s the best way to get crispy hash brown nests?
Dry the hash browns thoroughly, press them firmly into the muffin tin, and bake at 400°F (200°C). Pre-baking before adding eggs helps them crisp up nicely.
Can I use fresh potatoes instead of frozen hash browns?
Absolutely! Grate fresh potatoes, rinse to remove excess starch, and dry them very well before using to get the best crunch.
How do I prevent the eggs from overcooking?
Bake the nests first, then add eggs and cook at the same temperature for 10-12 minutes. Keep an eye on the whites setting but yolks still soft; adjust time based on your oven.
Are these nests suitable for meal prep?
They work well for make-ahead breakfasts. Store in the fridge and reheat in the oven for best texture. Avoid microwaving to keep crispiness.
Pin This Recipe!
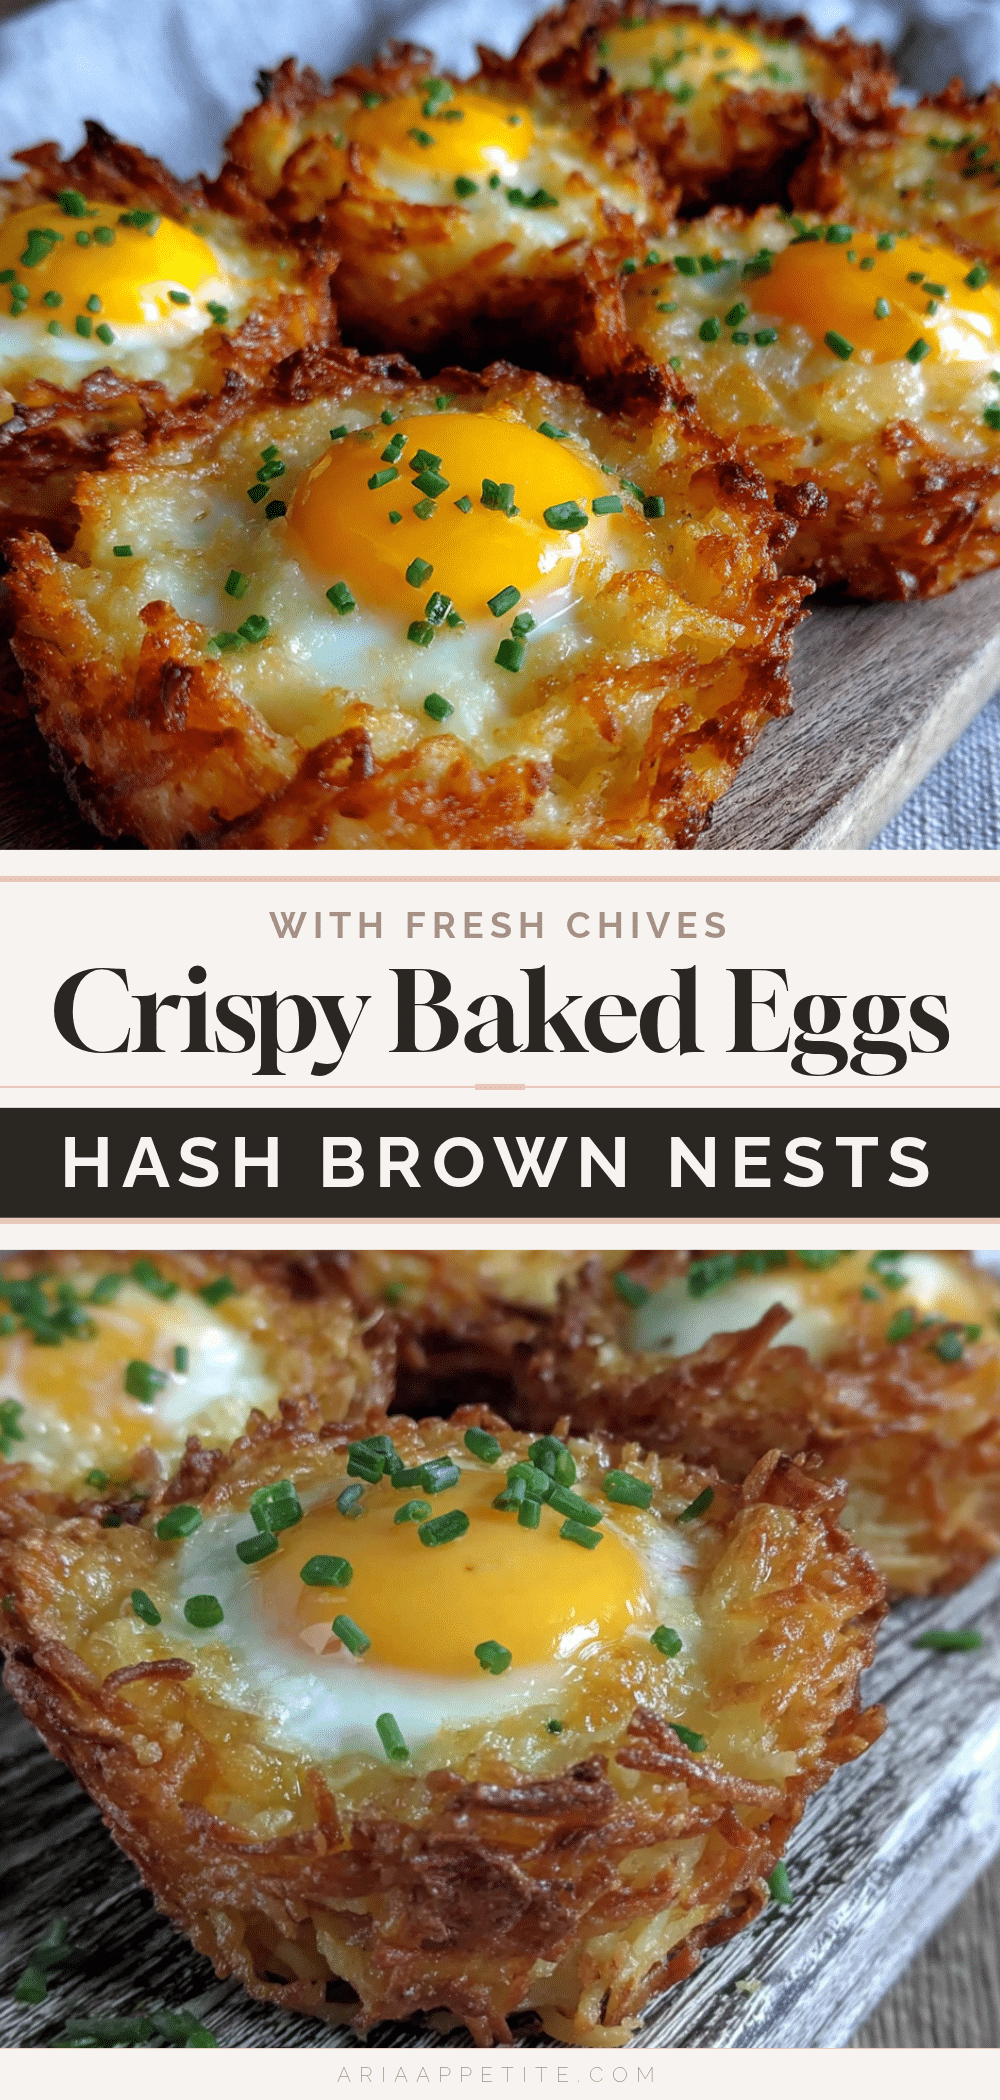
Crispy Baked Eggs in Hash Brown Nests

A quick and easy breakfast recipe featuring crispy baked eggs nestled in golden hash brown cups, topped with fresh chives for a flavorful and satisfying start to your day.
- Prep Time: 20 minutes
- Cook Time: 25-27 minutes
- Total Time: 45-47 minutes
- Yield: 6 servings (1 nest per serving) 1x
- Category: Breakfast
- Cuisine: American
Ingredients
- 4 cups frozen shredded hash browns (about 12 oz / 340g), thawed and patted dry
- 6 large eggs, preferably free-range or organic
- 2 tablespoons fresh chives, finely chopped
- 2 tablespoons olive oil or avocado oil, for coating the muffin tins
- 1 teaspoon salt, or to taste
- ½ teaspoon freshly ground black pepper
- ¼ teaspoon smoked paprika (optional)
- ¼ cup grated Parmesan cheese (about 1 oz / 25g, optional)
Instructions
- Preheat your oven to 400°F (200°C). Grease your muffin tin generously with olive or avocado oil.
- In a medium bowl, combine the thawed and well-drained hash browns with salt, pepper, smoked paprika (if using), and grated Parmesan. Toss gently until evenly mixed.
- Spoon about ⅓ cup (approximately 1.4 oz / 40g) of hash browns into each muffin cup. Press firmly against the sides and bottom to create a hollow nest shape.
- Bake the nests for 15 minutes until edges are golden and crisp.
- Remove the muffin tin carefully, then crack one egg into each hash brown nest. Return to the oven and bake for an additional 10-12 minutes, or until egg whites are set but yolks remain slightly runny.
- Remove from oven and sprinkle generously with fresh chopped chives. Let cool for a couple of minutes before gently lifting the nests out with a butter knife or small spatula.
Notes
Dry hash browns thoroughly to ensure crispiness. Press hash browns firmly into muffin tins to maintain nest shape. Bake nests before adding eggs to prevent sogginess. For fully cooked yolks, bake a few minutes longer but watch to avoid drying out nests. Avoid overcrowding muffin tin for even cooking. Reheat leftovers in oven or toaster oven to maintain crispiness; avoid microwave.
Nutrition
- Serving Size: 2 nests per serving
- Calories: 280320
- Fat: 18
- Carbohydrates: 20
- Fiber: 2
- Protein: 14
Keywords: baked eggs, hash brown nests, breakfast recipe, easy breakfast, crispy eggs, brunch, fresh chives