Love this? Save it for later!
Share the inspiration with your friends
My daughter had claimed to hate boba tea for three years. Three whole years of watching her friends sip those giant drinks with the fat straws, her little nose wrinkled up like I’d offered her a spoonful of medicine. “The balls are weird, Mom,” she’d say, with the kind of dramatic finality only a seven-year-old can muster. Then last Tuesday, I made this version “just for myself” while she was doing homework at the kitchen table, and I found her standing at my elbow, straw in hand, fishing the last tapioca pearl from the bottom of my glass. She didn’t even ask permission. She just went for it.
Honestly, I wasn’t trying to convert her. I was just craving something sweet and creamy, and the store-bought boba tea packets felt too pricey for my grocery budget. So I decided to try making the tapioca pearls from scratch with stuff I already had in the pantry—brown sugar, tapioca starch, water. Let me tell you, the first batch was a sticky disaster. I used too much water, the pearls turned into a blob, and I nearly threw the whole pot in the sink. But I’m stubborn, and I wanted that drink. The second batch worked, and when I poured that warm brown sugar syrup over the pearls and added the cold milk, something clicked. It was rich, it was fun, and it was way better than anything from a cafe.
Maybe you’ve been there—staring at a $7 boba tea on the menu, wondering if your kids would even drink it, or if you’d be stuck finishing a giant sugary drink yourself. I get it. This recipe is for those moments. It uses simple ingredients, costs pennies per serving, and somehow turned my boba-hating kid into a full-on fan. She now asks for it every Friday after school. I keep a bag of tapioca starch in the pantry just for this. It’s become our little ritual, and honestly, I love it as much as she does.
Why You’ll Love This Recipe
This isn’t just another drink recipe. It’s the one that finally got my picky eater to stop fighting me at snack time. I’ve tested this version at least a dozen times, tweaking the pearl-to-syrup ratio and the steeping time until it was just right. Here’s why I keep coming back to it—and why I think you will too.
- Quick & Easy: From start to finish, you’re looking at about 45 minutes. Most of that time is hands-off while the pearls boil. Perfect for a weekend treat or a fun after-school activity with the kids.
- Simple Ingredients: You only need five main ingredients—tapioca starch, brown sugar, water, milk, and a little extra brown sugar for the syrup. No fancy tea powders or expensive imported syrups required.
- Perfect for Family Fun: Making the tapioca pearls is like a little science experiment in the kitchen. Kids love rolling the dough into tiny balls. It’s messy, tactile, and honestly, it’s a great way to spend a rainy afternoon together.
- Crowd-Pleaser: I’ve served this at birthday parties and playdates, and the kids always ask for seconds. The adults love it too—there’s something nostalgic about that creamy, sweet, chewy combo.
- Unbelievably Delicious: The homemade tapioca pearls have a soft, bouncy texture that store-bought versions just can’t match. And that brown sugar syrup? It coats every pearl in a deep, caramel-like sweetness that’s pure comfort.
What makes this recipe different from the rest is the technique. I spent a few batches figuring out the exact water-to-starch ratio so the pearls don’t turn into a gummy mess. The secret is to boil the brown sugar and water first, then add the starch off the heat. It creates a dough that’s easy to work with and pearls that stay soft even after they cool. Plus, the syrup is made right in the same pot, so you’re not dirtying extra dishes. It’s resourceful, it’s smart, and it’s designed for a busy home cook feeding a family on a budget.
This recipe is the kind that makes you close your eyes after the first sip. It’s comfort in a glass—affordable, homemade, and full of love. Whether you’re trying to win over a picky eater or just treating yourself to something special, this boba milk tea delivers every single time.
What Ingredients You Will Need
This recipe uses simple, wholesome ingredients that you can find at any regular grocery store. The magic happens when you combine them in the right way. Here’s everything you need, broken down by component.
For the Homemade Tapioca Pearls
- 1/2 cup (100g) dark brown sugar, packed — This gives the pearls their color and that deep, molasses-like sweetness. I prefer dark brown sugar for a richer flavor, but light brown sugar works in a pinch.
- 3/4 cup (180ml) water — Use filtered water for the best taste. Tap water can sometimes add a slight chlorine flavor that you don’t want in your sweet pearls.
- 1 cup (160g) tapioca starch — Also called tapioca flour. This is the key ingredient. I’ve tried other starches, and nothing gives the same chewy, bouncy texture. Bob’s Red Mill is a reliable brand that’s widely available.
For the Brown Sugar Syrup
- 1/2 cup (100g) dark brown sugar, packed — Yes, more brown sugar. This syrup is what coats the pearls and gives the drink its signature sweet, caramel flavor. Don’t skip it.
- 1/4 cup (60ml) water — Just enough to dissolve the sugar into a thick, pourable syrup.
For the Milk Tea Base
- 2 cups (480ml) whole milk — Whole milk gives the creamiest texture. If you’re dairy-free, oat milk or full-fat coconut milk work beautifully. I’ve tested both, and oat milk is my favorite alternative because it’s thick and doesn’t overpower the brown sugar.
- 2 tablespoons brown sugar syrup (from above) — This sweetens the milk just enough. You can adjust this to taste, depending on how sweet you like your drinks.
- Optional: 2 black tea bags or 1 tablespoon loose-leaf black tea — Traditional boba milk tea uses black tea for a slight bitterness that balances the sweetness. If you’re making this for kids who don’t like tea, you can skip it entirely and just use milk. My daughter prefers it without tea, so that’s how we usually make it at home.
That’s it. Five ingredients, plus a little water and optional tea. Everything is a pantry staple once you have tapioca starch on hand. I buy a big bag from the Asian grocery store—it’s way cheaper than the small boxes at the regular supermarket. Look for tapioca starch, not tapioca flour labeled as “glutinous,” which is a different product used for other dishes.
Equipment Needed
You don’t need any fancy equipment for this recipe. Here’s what I use every time I make it.
- Medium saucepan — A 2-quart saucepan works perfectly for cooking the tapioca pearls and making the syrup. I use my old stainless steel one; it’s nothing fancy, but it heats evenly.
- Mixing bowl — A medium heatproof bowl for mixing the dough. Glass or ceramic works best because it doesn’t react with the hot sugar.
- Wooden spoon or silicone spatula — For stirring the hot sugar mixture and the dough. A silicone spatula is great because it doesn’t scratch your pot.
- Small cookie scoop or teaspoon — For portioning the dough into pearls. A teaspoon works fine, but a small cookie scoop makes the process faster and more uniform. I found mine at a dollar store for two bucks.
- Slotted spoon — For scooping the cooked pearls out of the hot water. A fine-mesh strainer works too.
- Glass or jar for serving — A tall glass shows off the beautiful layers of brown sugar syrup, milk, and pearls. Wide straws are essential for drinking the pearls—you can find reusable silicone ones online or at kitchen supply stores.
- Optional: kitchen scale — I know measuring by volume is easier, but a scale gives you more consistent results with the tapioca pearls. If you don’t have one, just spoon the tapioca starch into your measuring cup and level it off—don’t pack it down.
That’s really all you need. No expensive boba maker, no special tools. Just a pot, a bowl, and a little patience.
Preparation Method
This method might look long, but I promise it’s straightforward. I’ve broken it down into clear steps with all the little tips I learned the hard way. Take your time with the dough—it’s the most important part.
Step 1: Make the Tapioca Pearl Dough
In a medium saucepan, combine the 1/2 cup packed dark brown sugar and 3/4 cup water. Stir them together over medium-high heat until the sugar is completely dissolved and the mixture comes to a full boil. This takes about 2-3 minutes. You’ll see big bubbles forming across the surface. Remove the pot from the heat immediately. Now, dump in the 1 cup of tapioca starch all at once. Stir vigorously with your wooden spoon or spatula. The mixture will look lumpy and weird at first—don’t panic. Keep stirring until it comes together into a shaggy dough. It should look like wet sand that holds together when pressed.
Step 2: Knead the Dough
Turn the dough out onto a clean work surface. Let it cool for about a minute—it will be hot. Once it’s cool enough to handle, knead it gently with your hands for about 2 minutes. If the dough is too sticky, sprinkle a little extra tapioca starch on the surface. If it’s too dry and crumbly, add a teaspoon of water at a time. The finished dough should be smooth, pliable, and not sticky at all. It should feel like soft play-dough. I once added too much water and ended up with a sticky mess that I had to fix by kneading in more starch. Learn from my mistake and go slow.
Step 3: Shape the Pearls
Roll the dough into a log about 1 inch thick. Cut the log into small pieces, about 1/4 inch wide. Roll each piece between your palms into a small ball. The pearls should be about the size of a small pea—roughly 1/4 inch in diameter. They will expand slightly when cooked, so don’t make them too big. Place the shaped pearls on a baking sheet dusted with a little tapioca starch to prevent sticking. This is the step where kids can help. My daughter loves rolling the dough into balls, even if some end up looking like tiny potatoes. It’s fine—they all taste the same.
Step 4: Cook the Tapioca Pearls
Bring a large pot of water to a rolling boil. You need enough water to give the pearls room to move—about 4 cups. Carefully drop the pearls into the boiling water. Give them a gentle stir to prevent them from sticking to the bottom. Reduce the heat to medium-high so the water stays at a gentle boil. Cook the pearls for 15-20 minutes. They will float to the surface after about 5 minutes, but keep cooking them. The pearls are done when they are uniformly translucent with a tiny white speck in the center. That speck will disappear as they cool. Taste one to check—it should be soft and chewy, not hard or gritty in the center.
Step 5: Make the Brown Sugar Syrup
While the pearls are cooking, make the syrup. In a small saucepan, combine the 1/2 cup packed dark brown sugar and 1/4 cup water. Bring to a simmer over medium heat, stirring constantly. Let it simmer for 2-3 minutes until it thickens slightly and becomes syrupy. Remove from heat and set aside. The syrup will thicken more as it cools.
Step 6: Sweeten the Pearls
Once the pearls are cooked, drain them in a colander and rinse them briefly with cool water to stop the cooking. Transfer the pearls to a bowl and pour the warm brown sugar syrup over them. Stir gently to coat every pearl. Let them sit in the syrup for at least 10 minutes. This is crucial—the pearls soak up the syrup and become sweet and flavorful. If you skip this step, the pearls will be bland. I learned this the hard way on my first attempt, and the drink was a total letdown.
Step 7: Assemble the Drinks
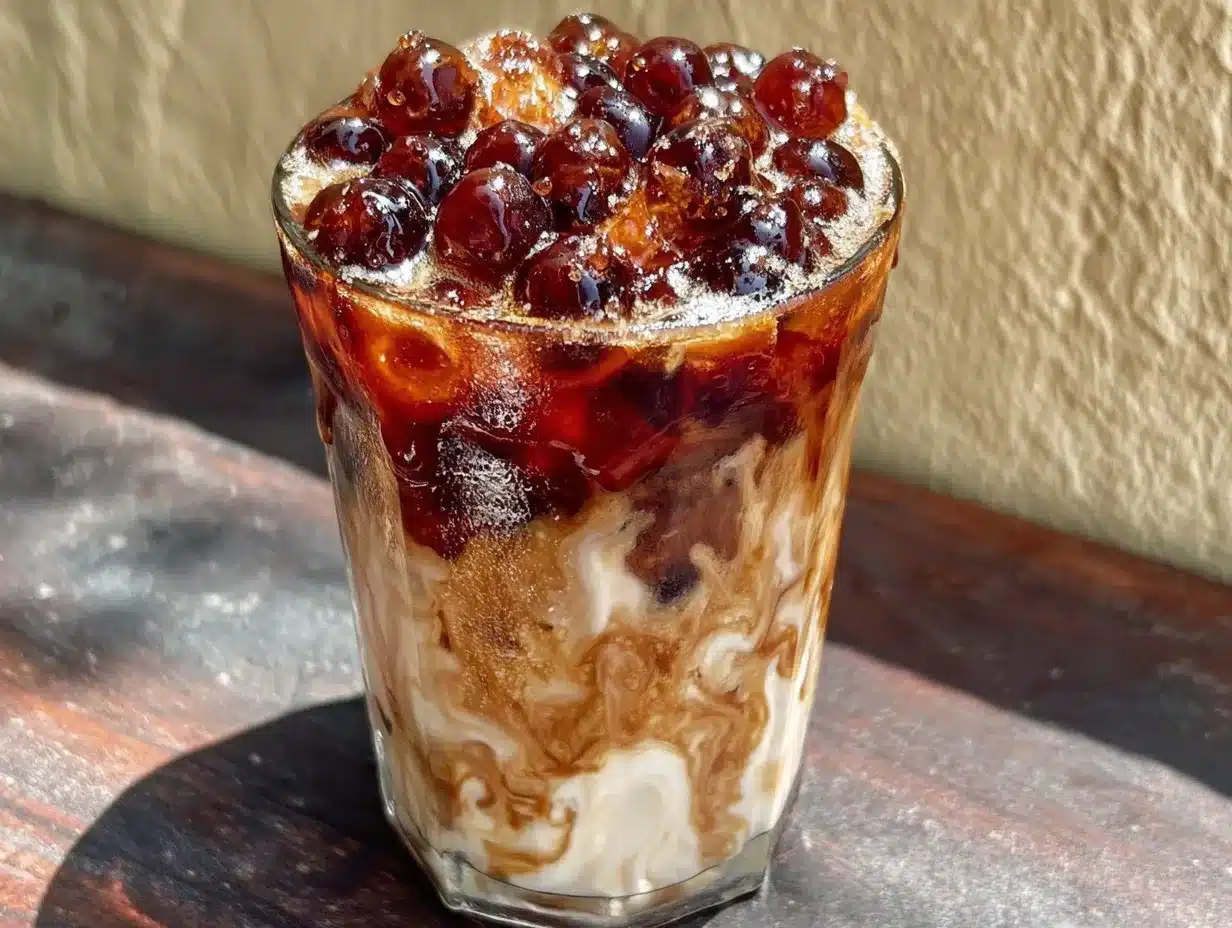
If you’re using tea, steep 2 black tea bags in 1/2 cup of hot water for 3-5 minutes. Remove the tea bags and let the tea cool slightly. To assemble each glass, spoon about 2 tablespoons of the syrup-coated pearls into the bottom of a tall glass. Drizzle a little extra syrup around the inside of the glass for those pretty brown streaks. Add ice cubes if you like a cold drink. Pour in the milk (or milk alternative) until the glass is about three-quarters full. If using tea, add it now—about 1/4 cup per glass. Stir gently to combine, or leave it layered for a beautiful presentation. Serve immediately with a wide straw.
Cooking Tips & Techniques
I’ve made this recipe enough times to have a few tricks up my sleeve. Here are the things I wish someone had told me before I started.
Don’t skip the boiling water step for the dough. The hot water and sugar mixture needs to be actively boiling when you add the tapioca starch. If the mixture isn’t hot enough, the starch won’t gelatinize properly, and your dough will be a crumbly mess. I rushed this once because my kids were hungry, and I ended up with dough that wouldn’t hold together. It was a waste of ingredients and time.
Work fast when rolling the pearls. The dough dries out quickly, especially if your kitchen is warm. Keep the unused dough covered with a damp cloth or plastic wrap while you’re shaping the pearls. If the dough starts to crack, just knead in a tiny drop of water to bring it back to life.
Use a timer for the pearls. It’s easy to get distracted and overcook them. Overcooked pearls become mushy and lose their signature chew. Set a timer for 15 minutes, then start testing. Every batch is a little different depending on the size of your pearls and the heat of your water.
Double the batch if you’re smart. The pearls freeze beautifully. After you shape them, spread them on a baking sheet and freeze until solid. Transfer to a freezer bag. When you’re ready to use them, drop them straight into boiling water—no need to thaw. Add 2-3 minutes to the cooking time. This is a huge time-saver for busy weeknights when the kids are begging for boba.
Adjust the sweetness for your family. My daughter likes her boba milk tea on the sweeter side, so I use the full 2 tablespoons of syrup in her milk. My husband prefers it less sweet, so I use only 1 tablespoon. Start with less and let everyone adjust their own drink. It’s easier than trying to fix an overly sweet batch.
Variations & Adaptations
This recipe is flexible, and I’ve tried several variations depending on what I have on hand or who I’m serving. Here are a few that work well.
Dairy-Free Version
Swap the whole milk for oat milk or full-fat coconut milk. Oat milk is my favorite because it’s creamy and doesn’t separate in cold drinks. Avoid almond milk—it’s too thin and watery for boba. I made that mistake once, and the drink was sad and thin. Never again.
Less Sweet Version
If you’re watching your sugar intake, use half the brown sugar in the syrup and skip the extra syrup in the milk. The pearls will still have a mild sweetness from the dough. You can also use unsweetened almond milk or regular milk with no added sugar. It won’t be as decadent, but it’s still a fun treat.
Fruity Boba
For a fun twist, add a splash of fruit syrup to the milk. I’ve tried strawberry and mango syrups from the pancake aisle, and they work great. Just stir in a tablespoon along with the brown sugar syrup. The kids love the pink or orange color, and it adds a fruity flavor that pairs well with the chewy pearls.
Tea-Free Version for Kids
This is how we always make it at home. Skip the black tea entirely and just use milk. The drink is still creamy and sweet, and the pearls provide all the texture. If your kids are sensitive to caffeine, this is the way to go. My daughter calls it “boba milk” and asks for it every Friday.
Matcha Boba Milk Tea
For a grown-up version, whisk 1 teaspoon of matcha powder with 2 tablespoons of hot water until smooth. Add this to the milk instead of black tea. The earthy matcha flavor is a beautiful contrast to the sweet brown sugar pearls. This is my personal favorite when I’m making a batch just for myself after the kids go to bed.
Serving & Storage Suggestions
This boba milk tea is best served fresh, but there are a few ways to enjoy it later.
Serving Temperature: Serve the drink cold or at room temperature. I like to add a handful of ice cubes to keep it chilled, especially on warm days. The pearls stay soft and chewy for about 2 hours after cooking. After that, they start to harden slightly, so drink up!
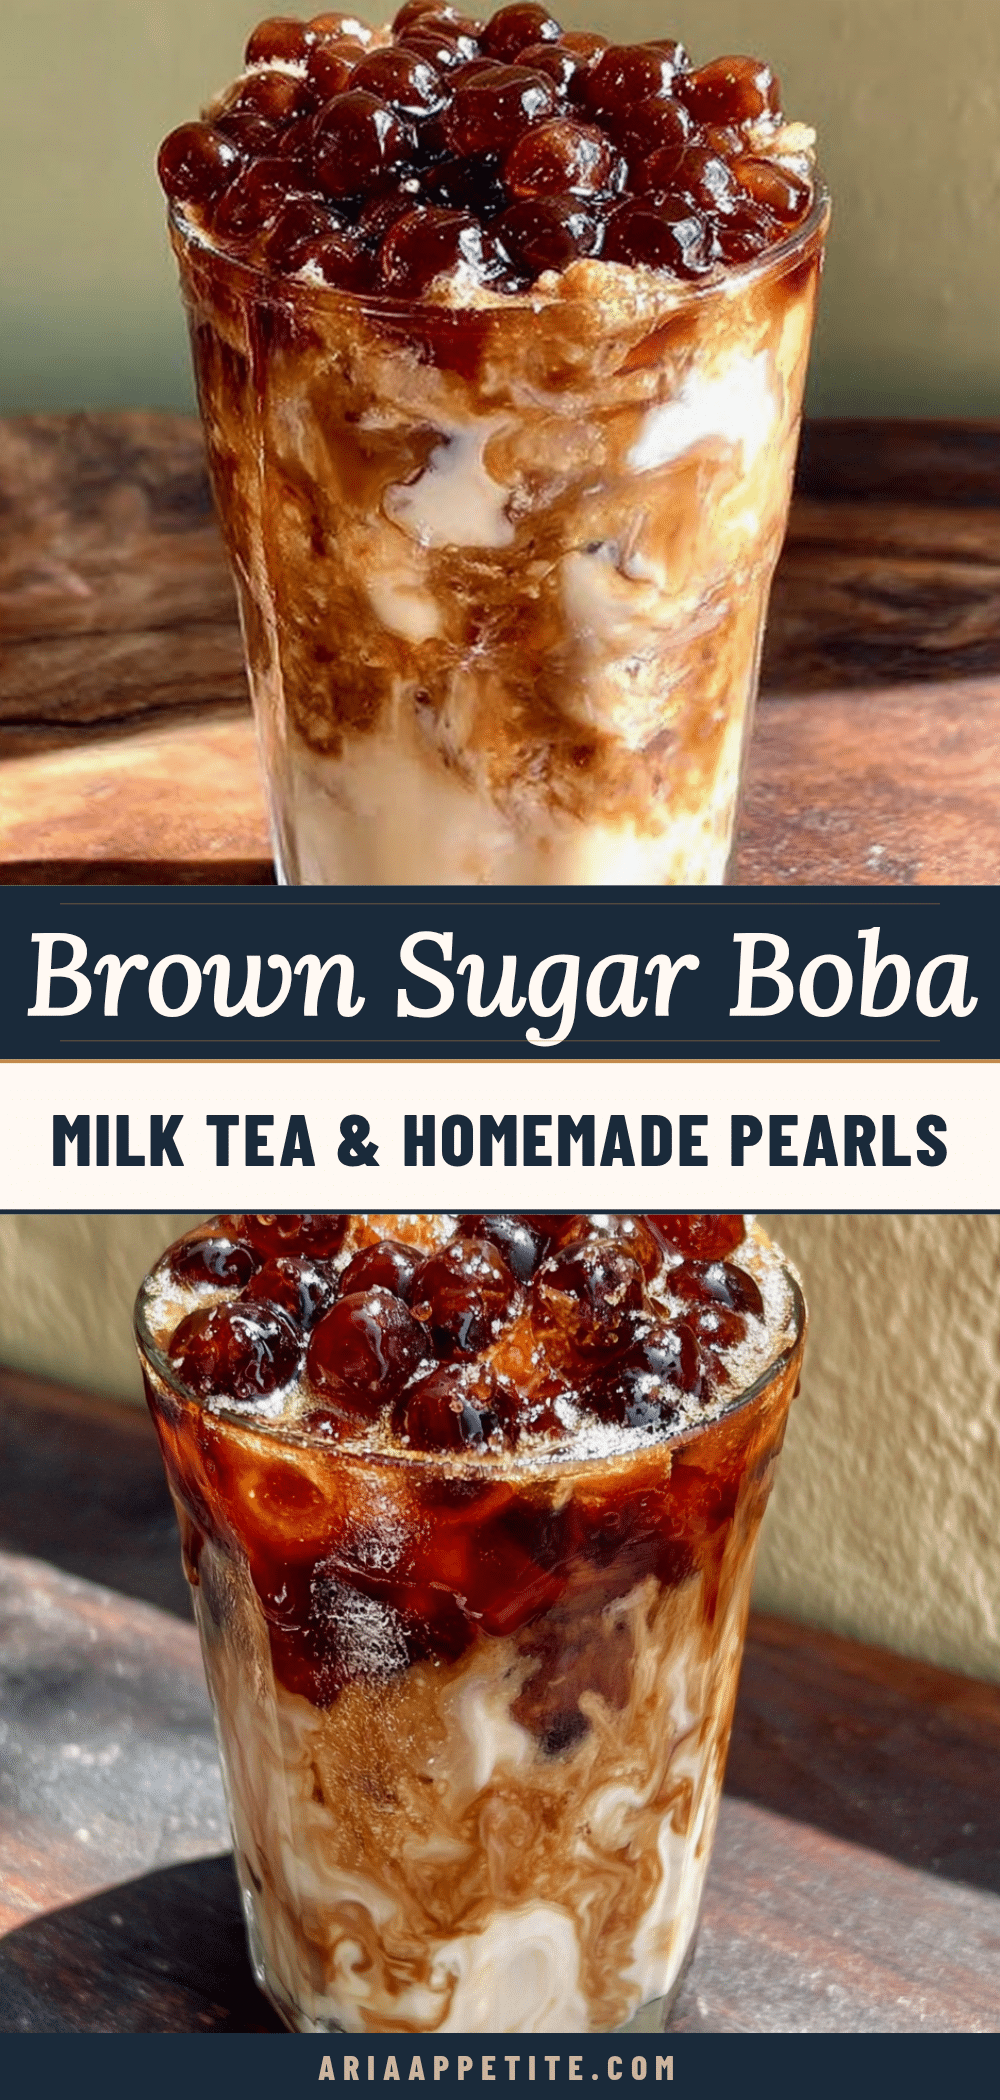
Presentation: For a pretty look, layer the syrup-coated pearls at the bottom of the glass, then add ice, then pour the milk slowly over the back of a spoon. This creates those beautiful brown streaks that make boba tea so photogenic. My daughter loves watching the syrup swirl into the milk. It’s a little moment of magic before you take that first sip.
Storage: Cooked pearls can be stored in their syrup in an airtight container in the refrigerator for up to 3 days. They will harden as they cool, but you can revive them by microwaving them for 20-30 seconds or dropping them into hot water for a minute. The texture won’t be as perfect as fresh, but it’s still good. The milk tea base should be made fresh—don’t store assembled drinks because the pearls will get mushy and the milk will separate.
Reheating: To reheat leftover pearls, place them in a microwave-safe bowl with a tablespoon of water. Microwave for 20 seconds, stir, and repeat until they are soft and warm. Alternatively, drop them into a small pot of simmering water for 30 seconds. Drain and toss with fresh syrup if needed.
Flavor Development: The pearls continue to absorb the syrup as they sit, so they become even sweeter and more flavorful after an hour or two in the fridge. I sometimes make the pearls the night before and let them soak in the syrup overnight. The next day, they are incredibly rich and soft. Just warm them up before serving.
Nutritional Information & Benefits
Let’s be real—this is a treat, not a health food. But there are a few bright spots worth mentioning.
Estimated Nutritional Values (per serving, with whole milk and full syrup):
- Calories: 380
- Total Fat: 8g
- Saturated Fat: 5g
- Cholesterol: 25mg
- Sodium: 120mg
- Total Carbohydrates: 72g
- Dietary Fiber: 0g
- Sugars: 48g
- Protein: 8g
Health Benefits: Tapioca starch is naturally gluten-free and grain-free, so this recipe works for people with celiac disease or gluten sensitivities. It’s also a source of quick energy from the carbohydrates, which is why it makes such a great after-school snack for active kids. The milk provides calcium and vitamin D for strong bones. If you use oat milk, you’ll get some added fiber and beta-glucans, which are good for heart health.
Dietary Considerations: This recipe is naturally gluten-free, nut-free (if you use whole milk), and can be made dairy-free and vegan with plant-based milk. It is not low-carb or low-sugar—this is a dessert drink, and it’s meant to be enjoyed in moderation. I serve it as a special weekend treat, not an everyday beverage.
Potential Allergens: Milk and dairy (if using whole milk). Tapioca starch is derived from cassava root and is not a common allergen. Always check your ingredient labels for cross-contamination warnings if you have severe allergies.
From my own wellness perspective, I believe in balance. We eat healthy meals during the week, and on Friday afternoons, we have boba. It’s a small ritual that brings joy without guilt. Life is too short to skip the sweet moments.
Conclusion
This kid-approved brown sugar boba milk tea has become a beloved tradition in our house, and I hope it becomes one in yours too. It’s proof that you don’t need a fancy cafe or a big budget to create something special. With a little tapioca starch, some brown sugar, and a bit of patience, you can make a drink that brings the whole family together.
What I love most about this recipe is how it turned my picky eater into a happy participant in the kitchen. She now asks to help roll the pearls every time, and she beams with pride when she sips her own creation. That’s the kind of win that makes all the sticky dough and messy counters worth it.
I encourage you to make this recipe your own. Adjust the sweetness, try different milks, add fruit syrups, or skip the tea entirely. The beauty of homemade boba is that you’re in control. And if your kids are skeptical at first? Give them time. They might surprise you, just like mine surprised me.
I’d love to hear how it goes! Drop a comment below and let me know if your family loved it as much as mine does. What variations did you try? Did your kids help roll the pearls? Share your stories—I read every single one. And if you’re looking for more fun, budget-friendly recipes the whole family will enjoy, don’t forget to browse our recipe collection for more inspiration. Happy cooking, friends!
Frequently Asked Questions
Can I use store-bought tapioca pearls instead of making them from scratch?
Absolutely. If you’re short on time, you can buy dried tapioca pearls from most Asian grocery stores or online. Just follow the package instructions for cooking, then toss them in the brown sugar syrup. The texture won’t be exactly the same as homemade, but it’s a perfectly good shortcut for busy weeknights.
Why did my tapioca pearls turn into a sticky mess?
This usually happens when the dough has too much water. The next time, try adding the tapioca starch to the boiling sugar water all at once and stirring vigorously. If the dough is still sticky after kneading for a minute, dust your hands and the work surface with a little extra tapioca starch. It should come together into a smooth, non-sticky dough.
Can I make this recipe without a kitchen scale?
Yes, you can use measuring cups. Just be careful to spoon the tapioca starch into the cup and level it off with a knife—don’t scoop directly from the bag, which packs the starch and gives you too much. For the brown sugar, pack it firmly into the measuring cup. The results might vary slightly, but it will still work.
How do I get the pearls to stay soft after they cool?
The key is to let them soak in the brown sugar syrup for at least 10 minutes after cooking. The syrup keeps the pearls hydrated and soft. If you store them in the fridge, they will harden, but you can revive them by microwaving for 20-30 seconds or dropping them into hot water for a minute. Always store them in the syrup, not plain water.
Is this recipe safe for toddlers or young children?
The tapioca pearls are a choking hazard for very young children, especially those under 3 years old. The pearls are small, round, and chewy, which makes them difficult for little ones to manage. For older kids, always supervise them while they drink, and make sure they chew the pearls well before swallowing. You can also cut the pearls in half before serving if you’re concerned.
Pin This Recipe!
Easy Kid-Approved Brown Sugar Boba Milk Tea
This homemade brown sugar boba milk tea is a budget-friendly, kid-approved treat that turns picky eaters into fans. With simple ingredients and a fun, hands-on process, it’s perfect for family time and delivers a rich, creamy, and chewy experience.
- Prep Time: 15 minutes
- Cook Time: 30 minutes
- Total Time: 45 minutes
- Yield: 2 servings 1x
- Category: Beverage
- Cuisine: Taiwanese
Ingredients
- 1/2 cup (100g) dark brown sugar, packed
- 3/4 cup (180ml) water
- 1 cup (160g) tapioca starch
- 1/2 cup (100g) dark brown sugar, packed (for syrup)
- 1/4 cup (60ml) water (for syrup)
- 2 cups (480ml) whole milk
- 2 tablespoons brown sugar syrup (from above)
- Optional: 2 black tea bags or 1 tablespoon loose-leaf black tea
Instructions
- Make the Tapioca Pearl Dough: In a medium saucepan, combine 1/2 cup packed dark brown sugar and 3/4 cup water. Stir over medium-high heat until sugar dissolves and mixture comes to a full boil (2-3 minutes). Remove from heat immediately. Add 1 cup tapioca starch all at once and stir vigorously until a shaggy dough forms.
- Knead the Dough: Turn dough onto a clean surface. Let cool for 1 minute, then knead gently for 2 minutes. If sticky, add a little extra tapioca starch; if dry, add water 1 teaspoon at a time. Dough should be smooth, pliable, and not sticky.
- Shape the Pearls: Roll dough into a 1-inch thick log. Cut into 1/4-inch pieces and roll each into a small ball (about 1/4 inch diameter). Place on a baking sheet dusted with tapioca starch.
- Cook the Tapioca Pearls: Bring a large pot of water (about 4 cups) to a rolling boil. Drop in pearls and stir gently. Reduce heat to medium-high and cook for 15-20 minutes until pearls are translucent with a tiny white speck in the center. Drain and rinse briefly with cool water.
- Make the Brown Sugar Syrup: In a small saucepan, combine 1/2 cup packed dark brown sugar and 1/4 cup water. Bring to a simmer over medium heat, stirring constantly. Simmer for 2-3 minutes until thickened slightly. Remove from heat.
- Sweeten the Pearls: Transfer cooked pearls to a bowl and pour warm syrup over them. Stir gently and let sit for at least 10 minutes.
- Assemble the Drinks: If using tea, steep 2 black tea bags in 1/2 cup hot water for 3-5 minutes, then remove bags and let cool. Spoon 2 tablespoons syrup-coated pearls into each tall glass. Drizzle extra syrup around the inside of the glass. Add ice if desired. Pour in milk until glass is three-quarters full. If using tea, add 1/4 cup per glass. Stir gently or leave layered. Serve immediately with a wide straw.
Notes
The pearls freeze beautifully. After shaping, freeze on a baking sheet until solid, then transfer to a freezer bag. Cook from frozen, adding 2-3 minutes to cooking time. For less sweet version, use half the brown sugar in the syrup and skip extra syrup in the milk. For dairy-free, use oat milk or full-fat coconut milk. For a fruity twist, add a splash of fruit syrup to the milk. For matcha boba, whisk 1 teaspoon matcha powder with 2 tablespoons hot water and add instead of black tea.
Nutrition
- Serving Size: 1 glass (about 1 cup
- Calories: 380
- Sugar: 48
- Sodium: 120
- Fat: 8
- Saturated Fat: 5
- Carbohydrates: 72
- Protein: 8
Keywords: boba milk tea, brown sugar boba, homemade boba, kid-friendly boba, tapioca pearls, easy boba recipe