Love this? Save it for later!
Share the inspiration with your friends
My neighbor wasn’t trying to impress anyone. I’d stopped by to grab a measuring cup I’d lent her weeks ago, and the smell hit me before I even got through the screen door. Chocolate, warm and deep, but with something else underneath — something creamy and bright. She was standing at the counter in old sweatpants, spoon in one hand, licking the other clean like a kid caught with her hand in the cookie jar.
“Oh, these?” she said when I asked what on earth that smell was. “Just some brownie things. The kids wanted something fun.”
Just some brownie things. She said it like it was nothing. Like she hadn’t just created what I would later realize was the most ridiculously good dessert I’d tasted in months. She handed me one still warm from the pan, and I swear, I closed my eyes. The brownie was fudgy and rich, but inside there was this swirl of creamy cheesecake and real strawberry that caught me completely off guard. I stood there in her kitchen, probably looking like an absolute fool, eating a brownie that had no business being that good from a woman who acted like she’d just thrown it together.
Maybe you’ve been there — you taste something at someone else’s house and you can’t stop thinking about it. I asked for the recipe, of course. She shrugged and scribbled it on a napkin. I folded that napkin into my pocket and made them the next weekend. Then again the weekend after that. Honestly, I’ve lost count of how many times I’ve made these Kid-Approved Strawberry Cheesecake Stuffed Brownie Hearts since that day. They’ve become our family’s go-to for birthday parties, Valentine’s Day, rainy Saturday afternoons — basically any excuse I can find.
What gets me every time is how something so simple can feel so special. The brownie base is rich without being complicated. The cheesecake layer is smooth and tangy, and those little bits of strawberry throughout? Pure magic. They’re the kind of dessert that makes kids’ eyes go wide and adults pretend they’re only having one. I’ve never brought them anywhere without someone asking for the recipe. And now, I’m sharing it with you — the one that neighbor scribbled on a napkin, the one that’s become a staple in my kitchen, the one that proves you don’t need fancy techniques or expensive ingredients to make something unforgettable.
Why You’ll Love This Recipe
Let me tell you why these brownie hearts have earned a permanent spot in my recipe rotation. I’ve tested this recipe more times than I can count, tweaking the ratios, trying different baking times, and even experimenting with various strawberry preparations. What I’m sharing with you today is the version that works every single time.
- Simple Ingredients : You probably already have most of what you need in your pantry and fridge. No special trips to fancy grocery stores required.
- Quick & Easy : From start to finish, you’re looking at about 45 minutes. The hands-on time is even less — maybe 15 minutes of actual work.
- Perfect for Family Occasions : Birthday parties, Valentine’s Day, bake sales, or just a regular Tuesday — these fit right in.
- Crowd-Pleaser : I’ve yet to meet a kid who doesn’t love these. And adults? They go just as crazy for them.
- Unbelievably Delicious : The combination of fudgy brownie, creamy cheesecake, and sweet strawberry is next-level comfort food.
What makes this recipe different from all the other stuffed brownie recipes out there? It’s the little things. I use a specific technique for swirling the cheesecake mixture into the brownie batter that creates these beautiful pockets of creamy goodness throughout. And I’ve figured out exactly how to prep the strawberries so they don’t make the brownies soggy — a mistake I made more than once during testing, let me tell you.
This isn’t just another dessert recipe. It’s the kind that makes you close your eyes after the first bite. It’s comfort food reimagined — familiar enough to feel like home, but special enough to feel like a treat. Perfect for impressing guests without any stress, or turning an ordinary afternoon into something memorable.
What Ingredients You Will Need
This recipe uses simple, wholesome ingredients to deliver that incredible flavor combination without any fuss. Most of these are pantry and fridge staples you likely have on hand already.
For the Brownie Base:
- 1/2 cup (1 stick or 113g) unsalted butter, melted (I prefer Land O’Lakes for consistent results)
- 1 cup (200g) granulated sugar
- 2 large eggs, room temperature
- 1 teaspoon vanilla extract
- 1/3 cup (40g) unsweetened cocoa powder (I use Hershey’s Special Dark for deeper flavor)
- 1/2 cup (65g) all-purpose flour
- 1/4 teaspoon salt
- 1/4 teaspoon baking powder
For the Cheesecake Filling:
- 8 oz (226g) cream cheese, softened (full-fat works best for texture)
- 1/4 cup (50g) granulated sugar
- 1 large egg yolk
- 1/2 teaspoon vanilla extract
- 1/3 cup (about 50g) fresh strawberries, finely diced (pat them dry with paper towels first — this is important!)
Optional Topping:
- Powdered sugar for dusting
- Additional fresh strawberry slices for garnish
- Melted white chocolate for drizzling
A few notes on ingredients from my testing experience. For the cream cheese, I really recommend using the full-fat block style, not the spreadable kind in a tub. The spreadable version has more moisture and can make your cheesecake filling too loose. I’ve made that mistake, and the filling seeped right out of the brownies during baking.
For the strawberries, fresh is definitely better than frozen here. Frozen strawberries release too much liquid as they thaw, and that extra moisture can make your brownies turn out gummy. If strawberries aren’t in season, you can use freeze-dried strawberries crushed into small pieces — they add great flavor without the moisture problem.
If you need a dairy-free option, you can substitute the butter with melted coconut oil and use a dairy-free cream cheese alternative. I’ve tried this with Kite Hill brand cream cheese style spread, and it worked reasonably well, though the texture was slightly less creamy.
Equipment Needed
You don’t need any fancy gadgets for this recipe, which is part of what I love about it. Here’s what you’ll need:
- One 8×8 inch baking pan (a 9×9 works too, but your brownies will be slightly thinner)
- Parchment paper (for easy removal — trust me on this)
- Two medium mixing bowls
- Electric hand mixer or stand mixer (a whisk and some elbow grease works too)
- Rubber spatula
- Measuring cups and spoons
- Sharp knife and cutting board for dicing strawberries
- Heart-shaped cookie cutter (about 2-3 inches wide) — or you can just cut them into squares
If you don’t have a heart-shaped cookie cutter, don’t worry. You can absolutely just cut these into squares or rectangles. I’ve done both, and honestly, they taste exactly the same. But if you’re making these for Valentine’s Day or a special occasion, the heart shape adds that extra touch that kids absolutely love.
I found my cookie cutter at a dollar store for, well, a dollar. No need to spend a lot. And if you’re using a metal pan instead of glass, just reduce your baking time by about 5 minutes — metal conducts heat more efficiently.
Preparation Method
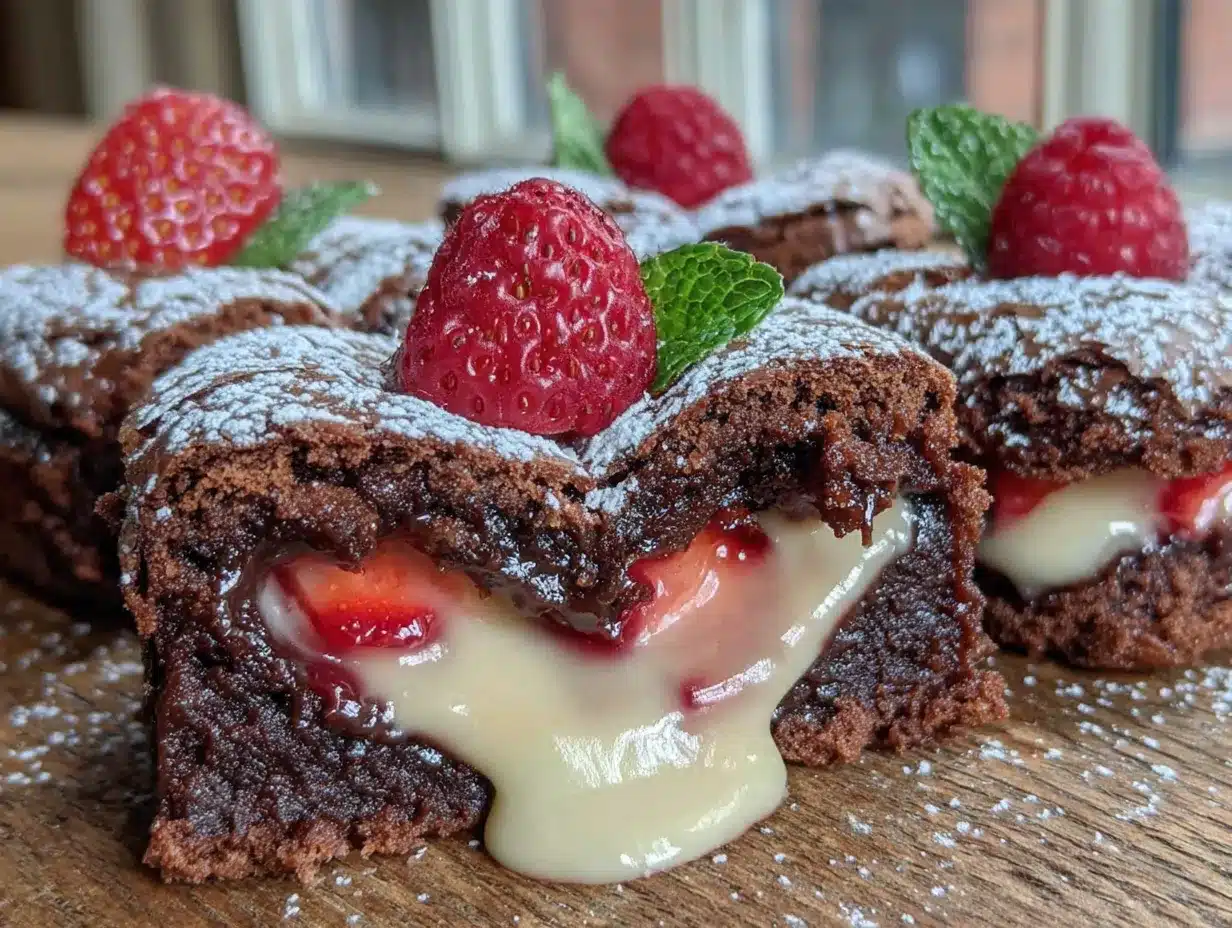
Alright, let’s get to the fun part. Here’s how to make these Kid-Approved Strawberry Cheesecake Stuffed Brownie Hearts step by step.
- Preheat your oven to 350°F (175°C). Line your 8×8 baking pan with parchment paper, leaving some overhang on two sides. This makes lifting the brownies out so much easier later. I learned this the hard way after spending 20 minutes trying to scrape brownies out of a pan.
- Make the brownie batter. In a medium bowl, whisk together the melted butter and sugar until well combined. The mixture should look smooth and slightly glossy. Add the eggs one at a time, whisking well after each addition. Stir in the vanilla extract.
- Add the dry ingredients. In a separate small bowl, whisk together the cocoa powder, flour, salt, and baking powder. Gradually add this to the wet mixture, stirring with a rubber spatula until just combined. Don’t overmix — you want to stop as soon as you don’t see any more flour streaks. Overmixing can make your brownies tough instead of fudgy.
- Prepare the cheesecake filling. In another bowl, beat the softened cream cheese with an electric mixer until smooth and creamy. Add the sugar and beat until fluffy, about 2 minutes. Add the egg yolk and vanilla, beating just until combined. Gently fold in the diced strawberries with a spatula.
- Layer the brownie batter. Spread about two-thirds of the brownie batter evenly into the prepared pan. This will be your bottom layer. It should be about 1/2 inch thick. Use a spatula to smooth it out as evenly as possible.
- Add the cheesecake layer. Carefully spoon the cheesecake mixture over the brownie layer, spreading it gently to create an even layer. Leave a small border around the edges — about 1/4 inch — so the brownie can seal the filling in.
- Top with remaining brownie batter. Drop spoonfuls of the remaining brownie batter over the cheesecake layer. Don’t worry about covering it completely. Use a knife to gently swirl the brownie batter into the cheesecake filling, creating a marbled effect. This is where the magic happens — those swirls create pockets of cheesecake throughout the brownies.
- Bake. Place the pan in the preheated oven and bake for 28-32 minutes. The edges should look set and a toothpick inserted into the center should come out with a few moist crumbs attached. If it comes out completely clean, you’ve overbaked them. I usually start checking at the 25-minute mark because ovens vary so much.
- Cool completely. This is the hardest part, I know. Let the brownies cool in the pan on a wire rack for at least 1 hour. Then refrigerate for another 30 minutes. Chilling makes cutting and shaping so much easier. If you try to cut them warm, the cheesecake filling will squish out everywhere. I speak from experience here.
- Cut into shapes. Once completely cooled and chilled, lift the brownies out of the pan using the parchment overhang. Place on a cutting board. If using a heart-shaped cookie cutter, press straight down firmly and lift. Wipe the cutter clean between cuts for the cleanest shapes. If you’re cutting squares, use a sharp knife and wipe it clean between cuts.
- Serve and enjoy! Dust with powdered sugar if desired, or drizzle with melted white chocolate. Serve at room temperature for the best texture.
Cooking Tips & Techniques
Over the many times I’ve made these, I’ve picked up a few tricks that make a real difference. Let me share what I’ve learned.
Don’t skip the chilling step. I know you’re going to want to cut into these as soon as they come out of the oven. I’ve been there. But trust me on this — letting them cool completely and then chilling for 30 minutes makes all the difference. The cheesecake filling needs time to set up, and cutting warm brownies will result in a messy, squished situation that’s still delicious but definitely not pretty.
Pat those strawberries dry. This might seem like a small thing, but it’s actually crucial. Fresh strawberries contain a lot of water, and when you dice them, that water comes out. If you add wet strawberries to your cheesecake filling, that extra moisture can make your brownies turn out gummy instead of fudgy. Just dice them, spread them on a paper towel, and pat them gently before folding them in.
Room temperature ingredients matter. This is one of those tips that sounds fussy but actually makes a real difference. Room temperature eggs incorporate more evenly into the batter, and softened cream cheese creates a smoother filling without lumps. If you forgot to take them out of the fridge ahead of time, place the eggs in a bowl of warm water for 5 minutes, and microwave the cream cheese in 10-second bursts until softened.
Watch your baking time. Every oven runs a little differently. My friend’s oven runs hot, and her brownies are done in 26 minutes. Mine takes the full 32 minutes. Start checking at 25 minutes, and remember that the brownies will continue to cook slightly as they cool in the pan. It’s better to pull them out a minute early than a minute late.
Use the toothpick test correctly. When you insert a toothpick into the center, you want it to come out with a few moist crumbs attached — not wet batter, but not completely clean either. If it comes out clean, your brownies are overbaked and will be dry. If it comes out with wet batter, they need more time.
Variations & Adaptations
One of the things I love most about this recipe is how easily it adapts to different tastes and dietary needs. Here are some variations I’ve tried and loved.
Berry Swap. Not a fan of strawberries? No problem. You can substitute raspberries, blueberries, or even chopped cherries. Each berry brings its own personality to the recipe. Raspberries add a lovely tartness that balances the sweet brownie, while cherries give it a almost Black Forest vibe. Just remember to pat any berries dry before adding them to the cheesecake filling.
Chocolate Variations. For an extra chocolate hit, try adding 1/2 cup of chocolate chips to the brownie batter before layering. Dark chocolate chips work beautifully here, adding little pockets of melted chocolate throughout. Or try white chocolate chips for a sweeter, creamier contrast to the rich cocoa.
Gluten-Free Option. I’ve made these with a 1:1 gluten-free flour blend (I like Bob’s Red Mill) and they turned out great. The texture was slightly more tender, but the flavor was spot on. Just make sure your blend includes xanthan gum for structure.
Mini Version. For parties or lunchbox treats, try making these in a mini muffin tin. Grease the tin well, add a spoonful of brownie batter, a small dollop of cheesecake filling, and another spoonful of batter. Bake for about 15-18 minutes. They’re adorable and perfect for little hands.
Extra Strawberry Flavor. If you really want that strawberry flavor to shine, try adding 1/4 teaspoon of strawberry extract to the cheesecake filling along with the vanilla. It intensifies the strawberry taste without adding extra moisture. I found strawberry extract at my local baking supply store, but you can also order it online.
Serving & Storage Suggestions
These brownie hearts are best served at room temperature, which lets the brownie stay fudgy and the cheesecake filling soften to that perfect creamy texture. If you’ve chilled them, just let them sit out for about 15-20 minutes before serving.
For presentation, I like to arrange them on a pretty plate with a light dusting of powdered sugar. A few fresh strawberry slices around the plate add a nice pop of color. If I’m feeling fancy, I’ll drizzle melted white chocolate over the top in zigzag patterns — kids go absolutely wild for this.
These pair beautifully with a glass of cold milk (obviously), a scoop of vanilla ice cream, or even a cup of coffee for the grown-ups. For a special dessert spread, I’ve served them alongside fresh fruit and a dollop of whipped cream.
Storage: Store any leftover brownie hearts in an airtight container in the refrigerator for up to 5 days. I like to layer them between sheets of parchment paper so they don’t stick together. Let them come to room temperature before serving for the best texture.
Freezing: These freeze beautifully! Place the cooled, cut brownie hearts in a single layer on a baking sheet and freeze for 1 hour. Then transfer them to a freezer-safe container or zip-top bag, separating layers with parchment paper. They’ll keep for up to 3 months. To thaw, just leave them at room temperature for about 30 minutes.
One thing I’ve noticed — the flavors actually get better after a day or two in the fridge. The strawberry flavor melds with the cheesecake and brownie in a way that’s even more delicious. So don’t feel like you have to eat them all the first day. Although, let’s be honest, that’s usually what happens at my house.
Nutritional Information & Benefits
I’m not going to pretend these are health food, but let’s look at what you’re getting. Per serving (one brownie heart, assuming 9 servings per batch):
- Calories: approximately 320
- Fat: 18g
- Carbohydrates: 38g
- Protein: 5g
- Sugar: 26g
- Fiber: 2g
The strawberries do bring some actual nutritional value to the table — they’re packed with vitamin C and antioxidants. And the cream cheese provides calcium and a bit of protein. The cocoa powder in the brownie base contains flavonoids, which are linked to heart health benefits.
For those with dietary concerns, this recipe contains dairy, eggs, and gluten. If you’re looking for a dairy-free version, I’ve had success using dairy-free cream cheese and coconut oil instead of butter. For a gluten-free version, use a good quality 1:1 gluten-free flour blend.
Look, these are a treat, and they’re meant to be enjoyed as such. But I like knowing that even in a dessert, there are a few redeeming qualities. And honestly, the joy on my kids’ faces when I pull these out of the oven is worth every single calorie.
Conclusion
These Kid-Approved Strawberry Cheesecake Stuffed Brownie Hearts have become more than just a recipe in my kitchen — they’re a tradition. They’re what I bring to bake sales, what we make on snow days, what my kids request for their birthdays. They’re the dessert that makes people close their eyes and smile.
What I love most is how approachable they are. You don’t need to be a pastry chef or own fancy equipment. You just need a few simple ingredients, a little bit of patience (especially during that chilling step), and the willingness to make something special for the people you love.
I hope you’ll try these and make them your own. Maybe you’ll add extra strawberries, or swap in raspberries, or drizzle them with caramel instead of white chocolate. That’s the beauty of a good recipe — it’s a starting point, not a rulebook.
When you make them, I’d love to hear how they turn out. Drop a comment below and let me know if your family loved them as much as mine does. And if you come up with a brilliant variation, please share it — I’m always looking for new ideas!
Happy baking, friends. Here’s to brownie hearts, strawberry dreams, and the simple joy of making something delicious for the people we love.
Frequently Asked Questions
Can I use frozen strawberries instead of fresh?
I don’t recommend it. Frozen strawberries release a lot of liquid as they thaw, which can make your brownies gummy. If fresh strawberries aren’t available, try using freeze-dried strawberries crushed into small pieces instead. They add great flavor without the moisture problem.
Can I make these ahead of time?
Absolutely! These actually taste even better the next day after the flavors have had time to meld. You can bake them a day ahead, store them in the refrigerator, and cut them into shapes just before serving. They also freeze beautifully for up to 3 months.
Why did my cheesecake filling leak out during baking?
This usually happens for one of two reasons. Either the brownie batter was too thin (make sure you’re measuring your flour correctly), or you didn’t leave enough of a border around the edges when adding the cheesecake layer. That border of brownie batter acts like a seal, keeping the filling contained.
Can I use a different shape besides hearts?
Of course! You can use any cookie cutter shape you like — stars, circles, flowers, whatever you have on hand. Or just cut them into squares or rectangles. They taste exactly the same no matter what shape they are.
How do I know when the brownies are done baking?
Start checking at the 25-minute mark. The edges should look set and slightly pulled away from the pan. Insert a toothpick into the center — it should come out with a few moist crumbs attached, not wet batter. If it comes out completely clean, they’re overbaked. Remember, they’ll continue cooking slightly as they cool in the pan.
Pin This Recipe!
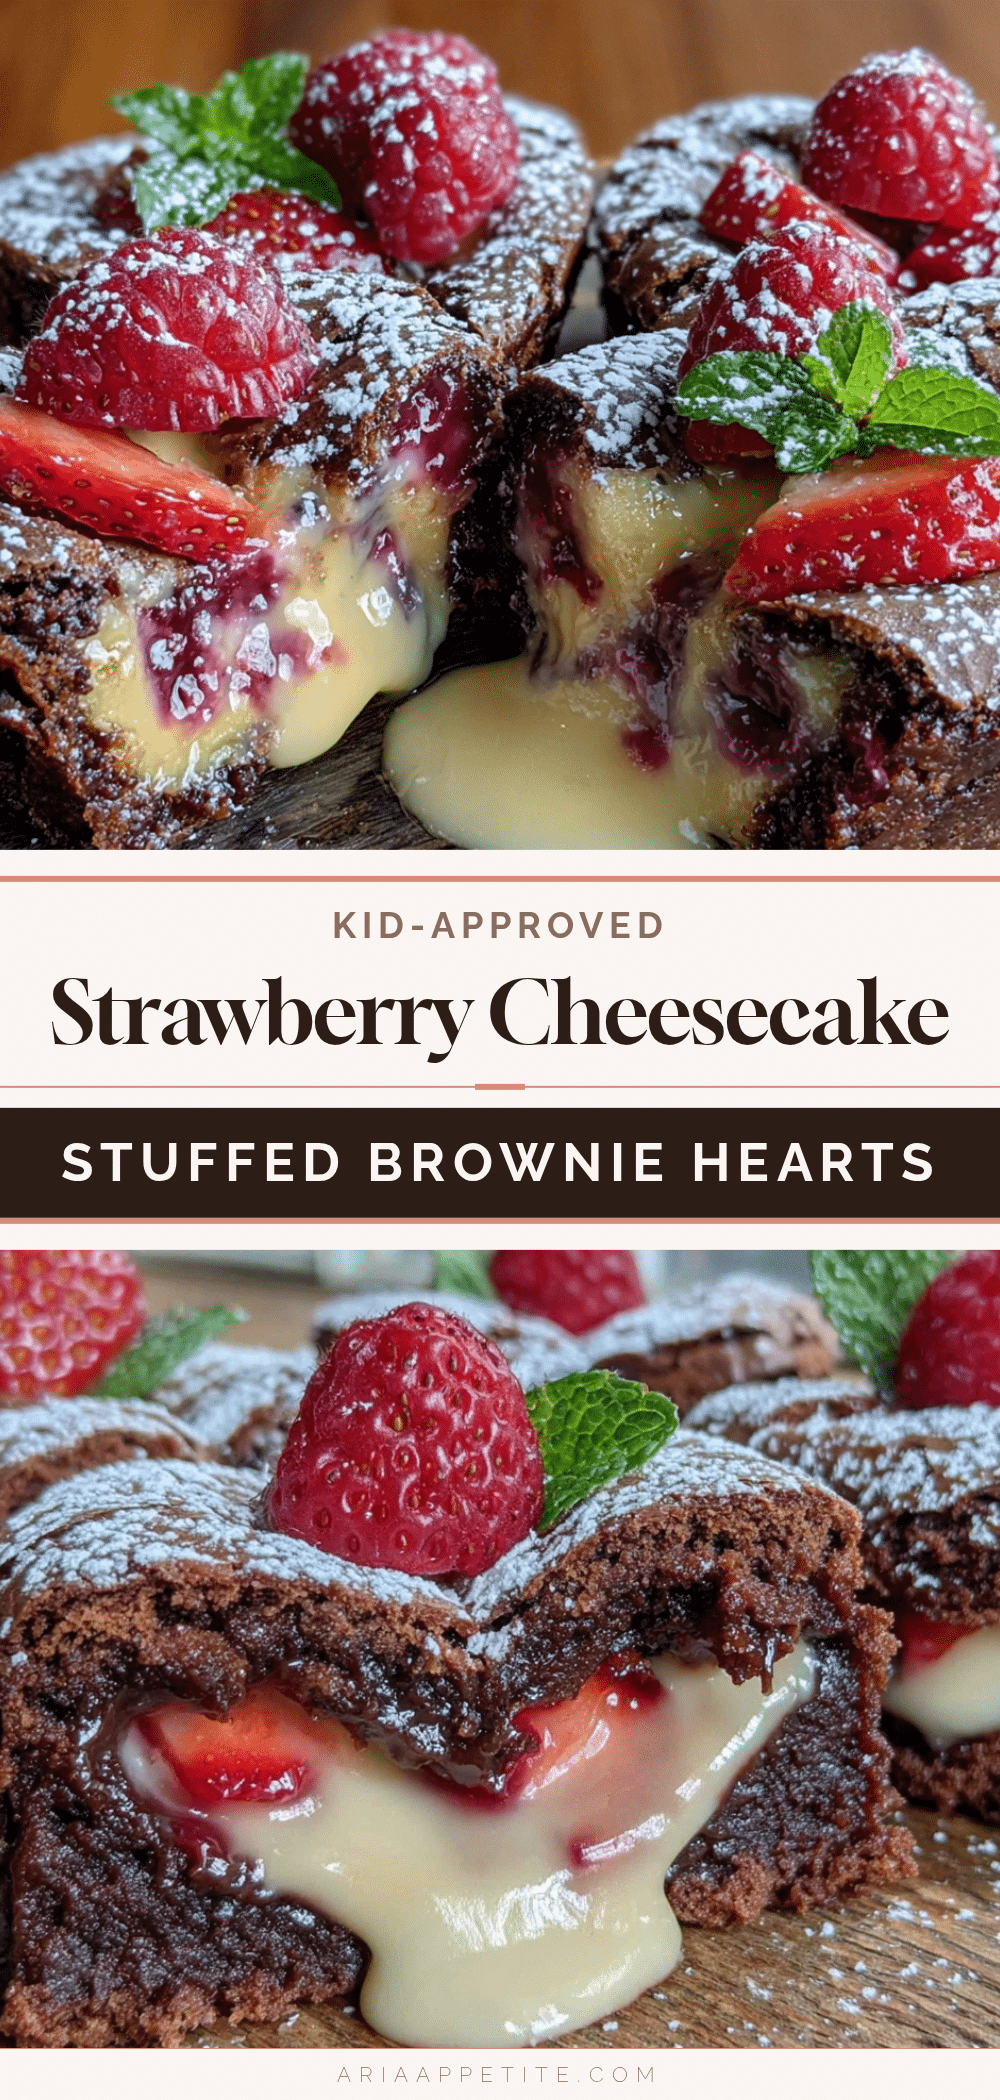
Kid-Approved Strawberry Cheesecake Stuffed Brownie Hearts
Fudgy brownies swirled with creamy cheesecake and fresh strawberries, cut into heart shapes for a fun, kid-friendly treat. Perfect for birthdays, Valentine’s Day, or any occasion that calls for a special dessert.
- Prep Time: 15 minutes
- Cook Time: 30 minutes
- Total Time: 45 minutes
- Yield: 9 servings 1x
- Category: Dessert
- Cuisine: American
Ingredients
- 1/2 cup (1 stick or 113g) unsalted butter, melted
- 1 cup (200g) granulated sugar
- 2 large eggs, room temperature
- 1 teaspoon vanilla extract
- 1/3 cup (40g) unsweetened cocoa powder
- 1/2 cup (65g) all-purpose flour
- 1/4 teaspoon salt
- 1/4 teaspoon baking powder
- 8 oz (226g) cream cheese, softened
- 1/4 cup (50g) granulated sugar
- 1 large egg yolk
- 1/2 teaspoon vanilla extract
- 1/3 cup (about 50g) fresh strawberries, finely diced and patted dry
- Powdered sugar for dusting (optional)
- Additional fresh strawberry slices for garnish (optional)
- Melted white chocolate for drizzling (optional)
Instructions
- Preheat your oven to 350°F (175°C). Line an 8×8 inch baking pan with parchment paper, leaving overhang on two sides.
- In a medium bowl, whisk together melted butter and sugar until smooth and glossy. Add eggs one at a time, whisking well after each. Stir in vanilla extract.
- In a separate small bowl, whisk together cocoa powder, flour, salt, and baking powder. Gradually add to wet mixture, stirring with a rubber spatula until just combined. Do not overmix.
- In another bowl, beat softened cream cheese with an electric mixer until smooth. Add sugar and beat until fluffy, about 2 minutes. Add egg yolk and vanilla, beating just until combined. Gently fold in diced strawberries.
- Spread about two-thirds of the brownie batter evenly into the prepared pan (about 1/2 inch thick).
- Spoon the cheesecake mixture over the brownie layer, spreading gently to create an even layer, leaving a 1/4-inch border around the edges.
- Drop spoonfuls of remaining brownie batter over the cheesecake layer. Use a knife to gently swirl the brownie batter into the cheesecake filling for a marbled effect.
- Bake for 28-32 minutes, until edges are set and a toothpick inserted into the center comes out with a few moist crumbs. Start checking at 25 minutes.
- Cool completely in the pan on a wire rack for at least 1 hour, then refrigerate for 30 minutes.
- Lift brownies out using parchment overhang. Place on a cutting board. Use a heart-shaped cookie cutter (2-3 inches) to cut out shapes, or cut into squares. Wipe cutter clean between cuts.
- Serve at room temperature. Dust with powdered sugar, drizzle with melted white chocolate, or garnish with fresh strawberry slices if desired.
Notes
Don’t skip the chilling step—it makes cutting much easier. Pat strawberries dry to prevent sogginess. Use room temperature ingredients for best results. Start checking for doneness at 25 minutes. For gluten-free, use a 1:1 gluten-free flour blend. For dairy-free, use melted coconut oil and dairy-free cream cheese. Store in an airtight container in the refrigerator for up to 5 days. Freeze for up to 3 months.
Nutrition
- Serving Size: 1 brownie heart
- Calories: 320
- Sugar: 26
- Sodium: 180
- Fat: 18
- Saturated Fat: 10
- Carbohydrates: 38
- Fiber: 2
- Protein: 5
Keywords: strawberry cheesecake brownies, stuffed brownies, heart-shaped brownies, kid-friendly dessert, Valentine's Day dessert, easy brownie recipe