Love this? Save it for later!
Share the inspiration with your friends
I wasn’t expecting baking advice from my accountant, but there I was, stuck in his office during tax season, watching him pull a photo from his wallet of the most incredible gingerbread house I’d ever seen. Not one of those kits from the store with the prefab walls that collapse if you sneeze. No, this was a two-foot-tall masterpiece with actual gingerbread shingles and a chimney that looked like real brickwork. “That’s my hobby,” he said, shrugging like it was no big deal. “The secret is the dough.”
Honestly, I almost laughed. My accountant? The guy who talks about depreciation schedules for fun? But let me tell you, when he started explaining the science behind sturdy gingerbread house dough, I grabbed a pen and started taking notes on the back of an old receipt. He told me about the time he spent three hours rolling out dough only to have his walls warp in the oven. The frustration in his voice was real—I mean, we’ve all been there, right? That moment when you realize your gingerbread village looks more like an earthquake zone than a winter wonderland.
What he shared changed everything. It wasn’t about fancy ingredients or complicated techniques. It was about ratios. The right balance of flour to fat. The perfect sugar content for structure. And most importantly, a trick with how you handle the dough that prevents spreading. I tested his method that very weekend, and you know what? It worked like a charm. The walls came out straight. The roof panels fit perfectly. And when I assembled the house, it held together without a single crack. That was three years ago, and I haven’t used another gingerbread house recipe since.
This sturdy gingerbread house dough has become my go-to for every holiday gathering. My family expects it now—they actually get disappointed if I show up with a store-bought kit. And honestly, I don’t blame them. There’s something magical about presenting a homemade gingerbread house at a party. It stops conversations. People gather around it. Kids point at the candy decorations. Adults ask for the recipe. It becomes the centerpiece of the whole evening.
Maybe you’ve had that moment where you wanted to impress your guests but ended up frustrated with a recipe that just didn’t cooperate. I get it. That’s exactly why I’m sharing this version today. This dough is forgiving enough for beginners but reliable enough for experienced bakers who need consistent results when hosting a crowd. It’s the kind of recipe that makes you look like a pro, even if you’re just someone who loves baking and wants to create something memorable.
Why You’ll Love This Recipe
Let me tell you why this recipe has earned a permanent spot in my holiday rotation. After testing countless versions over the years—some that crumbled, some that tasted like cardboard, and a few that actually grew mold before Christmas—I can say with confidence that this one delivers every single time.
- Incredibly Sturdy : This dough holds its shape perfectly during baking. No warped walls, no sagging roofs. The structural integrity is honestly impressive—I’ve had houses made with this dough survive being shipped across the country.
- Easy to Work With : Unlike some gingerbread doughs that crack when you try to roll them out, this one is pliable and forgiving. You can reroll scraps multiple times without the dough becoming tough.
- Perfect for Hosting : When you’re preparing for a gathering, the last thing you need is a complicated recipe. This dough comes together quickly, and you can make it days ahead of time. Your future self will thank you.
- Delicious Enough to Eat : Let’s be honest—some gingerbread house recipes taste terrible. Not this one. The flavor is warm, spicy, and genuinely enjoyable. Your guests might even nibble on the pieces before you assemble the house.
- Consistent Results : I’ve made this dough in humid weather, dry weather, and everything in between. It behaves the same way every time. That kind of reliability is priceless when you’re baking for a special occasion.
What sets this recipe apart is the technique. Most gingerbread house recipes use too much butter, which causes the dough to spread during baking. Others use too much flour, resulting in dry, crumbly walls that crack when you try to cut them. This version strikes the perfect balance. The dough contains just enough fat for flavor and tenderness, but not so much that it loses its shape. Plus, the addition of a secret ingredient—a small amount of vegetable oil—helps keep the dough flexible without making it greasy.
This isn’t just another gingerbread house recipe. It’s the one you’ll come back to year after year. The one that makes you excited to host a decorating party. The one that gets you compliments from guests who can’t believe you made it yourself. And honestly, isn’t that what holiday baking is all about?
What Ingredients You Will Need
This sturdy gingerbread house dough uses simple, pantry-friendly ingredients that work together to create a dough that’s both strong and flavorful. The key is understanding how each ingredient contributes to the final result—that way, you can make smart substitutions if needed without compromising the structure.
For the Dough
- 4 ½ cups (560g) all-purpose flour : The backbone of the dough. I recommend Gold Medal or King Arthur Flour for consistent protein content. Too much protein makes the dough tough, so avoid bread flour here.
- 1 teaspoon baking soda : Provides just enough lift to prevent the dough from becoming rock-hard, but not so much that it puffs up and loses its shape.
- ½ teaspoon salt : Balances the sweetness and enhances the spice flavors. Use fine sea salt for even distribution.
- 2 teaspoons ground ginger : The star spice. Make sure it’s fresh—old ginger loses its punch. I prefer McCormick or Simply Organic brands for consistent quality.
- 2 teaspoons ground cinnamon : Adds warmth and depth. Ceylon cinnamon is milder, while cassia cinnamon is more intense. Either works; just know the flavor profile will shift slightly.
- 1 teaspoon ground cloves : Strong and aromatic. A little goes a long way, so measure carefully. If you don’t have cloves, you can substitute allspice, but the flavor will be different.
- ½ teaspoon ground nutmeg : Freshly grated is best, but pre-ground works fine. Nutmeg adds a subtle sweetness that rounds out the spices.
- ½ teaspoon ground cardamom (optional) : This is my personal addition. It adds a floral, slightly citrusy note that makes the gingerbread taste more complex. Totally optional, but highly recommended.
- ¾ cup (170g) unsalted butter, cold and cut into small cubes : Cold butter is crucial. It creates flakiness and prevents the dough from spreading. I use Land O’Lakes or Kerrygold for their consistent fat content.
- ¾ cup (150g) packed dark brown sugar : Dark brown sugar has more molasses, which adds moisture and a deeper flavor. Light brown sugar works, but the dough will be slightly less flavorful.
- 1 large egg : Binds everything together. Let it come to room temperature for better incorporation. If you’re vegan, a flax egg works, but the dough will be slightly more fragile.
- ½ cup (170g) molasses : Not blackstrap molasses—that’s too bitter. Use regular or mild molasses. Grandma’s Molasses or Brer Rabbit are reliable brands. This ingredient is non-negotiable for authentic gingerbread flavor.
- 2 tablespoons vegetable oil : Here’s the secret ingredient. The oil keeps the dough flexible and prevents cracking without adding excess water that would activate gluten and make the dough tough.
For Assembly (Optional but Recommended)
- Royal icing : Acts as the glue. You’ll need about 3 cups. I use a simple recipe of 3 egg whites, 4 cups powdered sugar, and ½ teaspoon cream of tartar.
- Candy decorations : Gumdrops, candy canes, peppermints, and sprinkles. Choose candies that are firm enough to hold their shape—soft candies can cause the structure to sag.
When selecting your ingredients, pay attention to freshness. Spices lose their potency after about six months, so if your ginger or cinnamon has been sitting in the cabinet for years, replace them. The molasses should be fresh and pourable—if it’s crystallized, warm it slightly in a bowl of hot water before using. And please, don’t substitute margarine for the butter. Butter provides flavor and structure that margarine simply can’t replicate.
Equipment Needed
You don’t need fancy equipment to make this sturdy gingerbread house dough, but having the right tools makes the process much smoother. Here’s what I recommend:
- Large mixing bowl : You need enough room to work the dough without making a mess. A stainless steel or glass bowl works well.
- Electric mixer or pastry cutter : A stand mixer with the paddle attachment makes cutting the butter into the flour effortless. If you don’t have one, a pastry cutter or even your hands will work—just work quickly so the butter doesn’t warm up.
- Plastic wrap : Essential for chilling the dough. I prefer the press-and-seal kind because it clings tightly and prevents the dough from drying out.
- Rolling pin : A heavy rolling pin with even thickness rings is ideal. If you don’t have one, a regular rolling pin works—just be careful to roll evenly.
- Ruler : Measuring the thickness of your dough is crucial. Aim for ¼ inch (6mm) for walls and ⅛ inch (3mm) for roofs and details.
- Parchment paper : Line your baking sheets with parchment for easy cleanup and to prevent sticking. I buy the pre-cut sheets for convenience.
- Baking sheets : Heavy-duty, rimmed baking sheets work best. They distribute heat evenly and prevent warping. I use Nordic Ware or Chicago Metallic brands.
- Sharp knife or pizza cutter : A sharp blade is essential for clean cuts. A pizza cutter works great for straight lines, while a paring knife is better for detailed shapes.
- Cardboard templates : Cut your house patterns from sturdy cardboard. This ensures all your walls and roof pieces are identical. I save mine from year to year in a labeled envelope.
- Cooling rack : Allows air to circulate around the baked pieces, preventing sogginess. A wire rack with small gaps works best.
If you’re on a budget, skip the fancy rolling pin and use a wine bottle instead. Just make sure it’s clean and dry. And instead of a stand mixer, you can mix the dough by hand—it takes a bit more elbow grease, but the results are the same.
Preparation Method
Let me walk you through the process step by step. I’ve included timing estimates and visual cues so you know exactly what to look for at each stage.
- Combine the dry ingredients (5 minutes): In a large bowl, whisk together the flour, baking soda, salt, and all the spices. Make sure everything is evenly distributed. The mixture should smell fragrant and spicy. If it smells flat or dusty, your spices might be old.
- Cut in the butter (5-7 minutes): Add the cold butter cubes to the flour mixture. Using a pastry cutter or your fingertips, work the butter into the flour until it resembles coarse meal with some pea-sized butter pieces remaining. The texture should look like wet sand with small visible butter flecks. Don’t overwork it—you want those butter pieces for flakiness.
- Mix the wet ingredients (2 minutes): In a separate bowl, whisk together the brown sugar, egg, molasses, and vegetable oil until smooth. The mixture should be dark and glossy. If the molasses is too thick to whisk, warm the bowl slightly in a pan of hot water.
- Combine wet and dry (3 minutes): Pour the wet mixture into the flour-butter mixture. Stir with a wooden spoon or your mixer on low speed until a shaggy dough forms. It will look dry and crumbly at first—that’s normal. Keep mixing until it just comes together. Don’t overmix, or the dough will become tough.
- Knead and divide (2 minutes): Turn the dough out onto a lightly floured surface. Gently knead it 3-4 times until it forms a cohesive ball. Divide the dough into two equal portions, flatten each into a disk about 1 inch thick, and wrap tightly in plastic wrap.
- Chill the dough (minimum 2 hours, preferably overnight): This step is non-negotiable. Chilling solidifies the butter and allows the flour to fully hydrate. The dough should be firm to the touch but not rock-hard. If it’s too cold to roll, let it sit at room temperature for 10 minutes.
- Roll out the dough (10 minutes per batch): Preheat your oven to 350°F (175°C). On a lightly floured piece of parchment paper, roll one disk of dough to ¼-inch (6mm) thickness for walls. For roofs and smaller details, roll to ⅛-inch (3mm). Use a ruler to check thickness—eyeballing it leads to uneven baking. The dough should feel smooth and pliable, not sticky.
- Cut the shapes (10 minutes): Place your cardboard templates on the rolled dough and cut around them with a sharp knife or pizza cutter. Cut straight down—don’t saw back and forth, which can distort the edges. Transfer the cut pieces to a parchment-lined baking sheet, leaving at least 1 inch of space between them.
- Chill again (15 minutes): Place the baking sheet with the cut pieces in the refrigerator for 15 minutes. This re-chills the butter and prevents spreading during baking. You’ll notice the dough firms up noticeably.
- Bake (12-15 minutes for walls, 8-10 minutes for thin pieces): Bake until the edges are just beginning to darken and the centers look dry. The dough will puff slightly but should not spread. If your pieces spread, your dough was too warm—next time, chill longer. Let the pieces cool on the baking sheet for 5 minutes, then transfer to a cooling rack.
Pro tip for hosts : Bake your gingerbread pieces up to two weeks in advance. Store them in an airtight container at room temperature. When you’re ready to assemble, the pieces will be perfectly dry and ready for icing. This makes hosting a decorating party so much easier—you can focus on the fun part with your guests.
Cooking Tips & Techniques
After dozens of batches, I’ve learned a few things the hard way. Let me save you some frustration with these tips.
Measure your flour correctly. This is the most common mistake I see. Scooping flour directly from the bag compacts it, giving you up to 25% more flour than you need. Instead, spoon the flour into your measuring cup and level it off with a knife. Or better yet, use a kitchen scale. I promise, weighing your ingredients makes a huge difference in consistency.
Don’t skip the chilling steps. I know it’s tempting to rush, but each chill serves a purpose. The first chill hydrates the flour and firms the butter. The second chill after cutting prevents spreading. If you skip either one, your walls will warp, and your roof pieces won’t fit together properly. I learned this the hard way when I tried to speed through the process before a party. The resulting house looked like it had survived an earthquake.
Use a template, not guesswork. Freehand cutting almost never works. Spend 15 minutes cutting cardboard templates before you start. Label each piece—”front wall,” “side wall,” “roof left,” “roof right.” This organization saves time and ensures all your pieces fit together perfectly.
Bake in batches if needed. Don’t crowd your baking sheets. Overcrowding causes uneven baking and can lead to warping. If you have multiple sheets, bake them one at a time on the middle rack. Rotate the sheet halfway through baking for even color.
Check for straight edges immediately. As soon as the pieces come out of the oven, check them against your templates. If an edge has spread or warped, use a sharp knife to trim it while the piece is still warm. Once it cools completely, it will be too hard to trim cleanly.
Let pieces dry completely before assembling. This is crucial. If you try to assemble a house with warm or slightly soft pieces, the structure will sag. Let the pieces cool for at least 2 hours, or better yet, overnight. You want them to be completely firm and dry.
Multitasking strategy for hosts : While your gingerbread pieces are cooling, prepare your royal icing and set out decorations. This way, everything is ready when your guests arrive. I like to put each type of candy in a separate bowl and provide small piping bags filled with icing. It makes the decorating process smooth and enjoyable for everyone.
Variations & Adaptations
This sturdy gingerbread house dough is wonderfully versatile. Here are some ways to customize it for your needs.
Gluten-free version : Substitute the all-purpose flour with a high-quality gluten-free blend that contains xanthan gum. I’ve had good results with Bob’s Red Mill 1-to-1 Baking Flour. The dough will be slightly more fragile, so handle it gently and chill it thoroughly before rolling. You might need to add an extra tablespoon of water if the dough feels too dry.
Vegan adaptation : Replace the butter with vegan butter sticks (not spreadable margarine) and use a flax egg (1 tablespoon ground flaxseed mixed with 3 tablespoons water). The dough will be slightly less rich, but it still holds its shape beautifully. Just be aware that vegan butter has a lower melting point, so extra chilling is essential.
Spice variations : Feel free to adjust the spice blend to your taste. For a warmer flavor, add ½ teaspoon of allspice. For a more aromatic house, include ¼ teaspoon of ground star anise. My personal favorite variation uses 1 tablespoon of pumpkin pie spice instead of the individual spices—it simplifies the recipe without sacrificing flavor.
Chocolate gingerbread : Replace ½ cup of the flour with ½ cup of unsweetened cocoa powder. This creates a darker, richer dough that looks stunning with white icing and colorful candies. The chocolate flavor pairs beautifully with peppermint decorations.
Different house styles : Don’t limit yourself to a traditional house shape. This dough works perfectly for churches, barns, castles, or even gingerbread cottages. Just adjust your templates accordingly. I once made a gingerbread lighthouse that was the hit of a holiday party—the cylindrical shape was surprisingly easy to achieve with this sturdy dough.
Smaller projects : If you’re not ready for a full house, use this dough to make gingerbread cookies in fun shapes. The dough holds intricate details beautifully, making it perfect for detailed cookie cutters. Just reduce the baking time to 8-10 minutes.
Serving & Storage Suggestions
Presenting your gingerbread house is half the fun. Here’s how to make it look amazing and last as long as possible.
Serving temperature : Display your gingerbread house at room temperature. Avoid placing it near heat sources, direct sunlight, or humid areas. A cool, dry spot is ideal. I set mine on a decorative cake stand or a wooden board covered with parchment “snow.”
Presentation tips : Create a winter scene around your house. Use powdered sugar as snow, arrange small trees made from sugar cones, and add a path of white candies leading to the front door. For a showstopper effect, place the house on a mirrored surface to reflect the decorations.
Complementary dishes : If you’re serving the gingerbread house at a party, pair it with warm drinks like hot cocoa, mulled wine, or spiced cider. The gingerbread flavor complements these beverages perfectly. You can also serve small gingerbread cookies alongside the house for guests to nibble.
Storage instructions : An assembled gingerbread house will last for weeks if stored properly. Keep it in a cool, dry place away from humidity. If you live in a humid climate, consider storing the house in a large, sealed container when not on display. I’ve had houses made with this dough last for over a month without any issues.
Freezing instructions : Unbaked dough can be frozen for up to 3 months. Wrap it tightly in plastic wrap and then in foil. Thaw in the refrigerator overnight before rolling. Baked, unassembled pieces can also be frozen for up to 2 months. Just wrap them carefully and thaw at room temperature before assembling.
Reheating tips : If your gingerbread house pieces become slightly soft (which can happen in humid weather), place them on a baking sheet in a 300°F (150°C) oven for 5 minutes. This will crisp them back up. Let them cool completely before handling.
Flavor development : Interestingly, gingerbread actually improves with age. The spices mellow and meld together, creating a more harmonious flavor. So don’t worry if you make your pieces weeks in advance—they’ll taste even better when it’s time to assemble.
Nutritional Information & Benefits
While gingerbread houses are more about decoration than nutrition, here’s what you should know.
Estimated nutritional values per serving (one wall piece, about 30g) :
- Calories: 120
- Fat: 4g
- Carbohydrates: 20g
- Protein: 2g
- Fiber: 0.5g
- Sugar: 8g
Health benefits of key ingredients : Ginger has anti-inflammatory properties and can help with digestion. Cinnamon may help regulate blood sugar levels. Molasses contains iron, calcium, and magnesium. While this is certainly a treat, the spices do offer some nutritional value beyond just flavor.
Dietary considerations : This recipe contains gluten, dairy, and eggs. For gluten-free and vegan options, see the variations section above. The recipe is nut-free as written, making it safe for most nut allergies. However, always check your spice blends for potential cross-contamination if allergies are a concern.
Allergen information : The main allergens in this recipe are wheat (gluten), dairy (butter), and eggs. The royal icing used for assembly typically contains egg whites. If you need an egg-free icing, use a simple powdered sugar and water mixture, though it won’t be as strong.
Personal wellness perspective : I believe in balance. This gingerbread house is a once-a-year treat meant for celebration and creativity. It’s not something you eat every day. So enjoy the process, savor the occasional nibble, and focus on the joy of creating something beautiful with friends and family. That’s where the real nourishment comes from.
Conclusion
This sturdy gingerbread house dough has truly changed how I approach holiday baking. It’s reliable, forgiving, and produces consistently beautiful results that impress everyone who sees them. Whether you’re hosting a decorating party for friends, building a showstopper for a family gathering, or just want to create something special for your own home, this recipe delivers.
The best part? You can customize it endlessly. Change the spices, try different house designs, or experiment with decorations. Each house becomes a reflection of your creativity and personality. That’s what makes this tradition so special—it’s never the same twice.
I’d love to hear about your gingerbread house adventures. What design did you choose? What candies did you use? Did you discover any tricks that made the process easier? Drop a comment below and share your experience. Your tips might help another baker create their own masterpiece.
Remember, the perfect gingerbread house isn’t about perfection. It’s about the laughter, the sticky fingers, the occasional collapsed roof, and the pride you feel when you step back and see what you’ve created. So roll up your sleeves, preheat that oven, and let’s make some holiday magic together. You’ve got this!
Frequently Asked Questions
Can I make this gingerbread house dough ahead of time?
Absolutely! The dough can be refrigerated for up to 5 days or frozen for up to 3 months. Just wrap it tightly in plastic wrap and then in foil. When you’re ready to use it, thaw frozen dough in the refrigerator overnight. Let it sit at room temperature for about 10 minutes before rolling—it should be firm but pliable.
Why did my gingerbread pieces spread during baking?
Spreading usually happens when the dough is too warm. Make sure you chill the cut pieces on the baking sheet for at least 15 minutes before baking. Also, check that your oven temperature is accurate—an oven that’s too cool can cause spreading. Use an oven thermometer to verify your oven’s temperature.
Can I use this dough for gingerbread cookies instead of a house?
Yes, and it works beautifully! The dough holds intricate shapes well, making it perfect for detailed cookie cutters. Just roll the dough to ¼-inch thickness and bake for 8-10 minutes at 350°F (175°C). The cookies will be sturdy enough for decorating but still delicious to eat.
How long will my assembled gingerbread house last?
In a cool, dry place, your gingerbread house can last for several weeks to a few months. The key is keeping it away from humidity and heat. If you live in a humid climate, consider storing the house in a large, sealed container when not on display. I’ve had houses made with this dough last well past the holiday season.
What’s the best way to transport a gingerbread house?
Transporting a gingerbread house requires careful planning. If possible, transport the pieces unassembled and assemble them at your destination. If you must transport an assembled house, place it on a sturdy board or cake stand, and secure it in a box with non-slip matting or crumpled paper around the base. Drive slowly and avoid sharp turns. For extra security, you can add a few extra dabs of royal icing at the seams before moving.
Pin This Recipe!
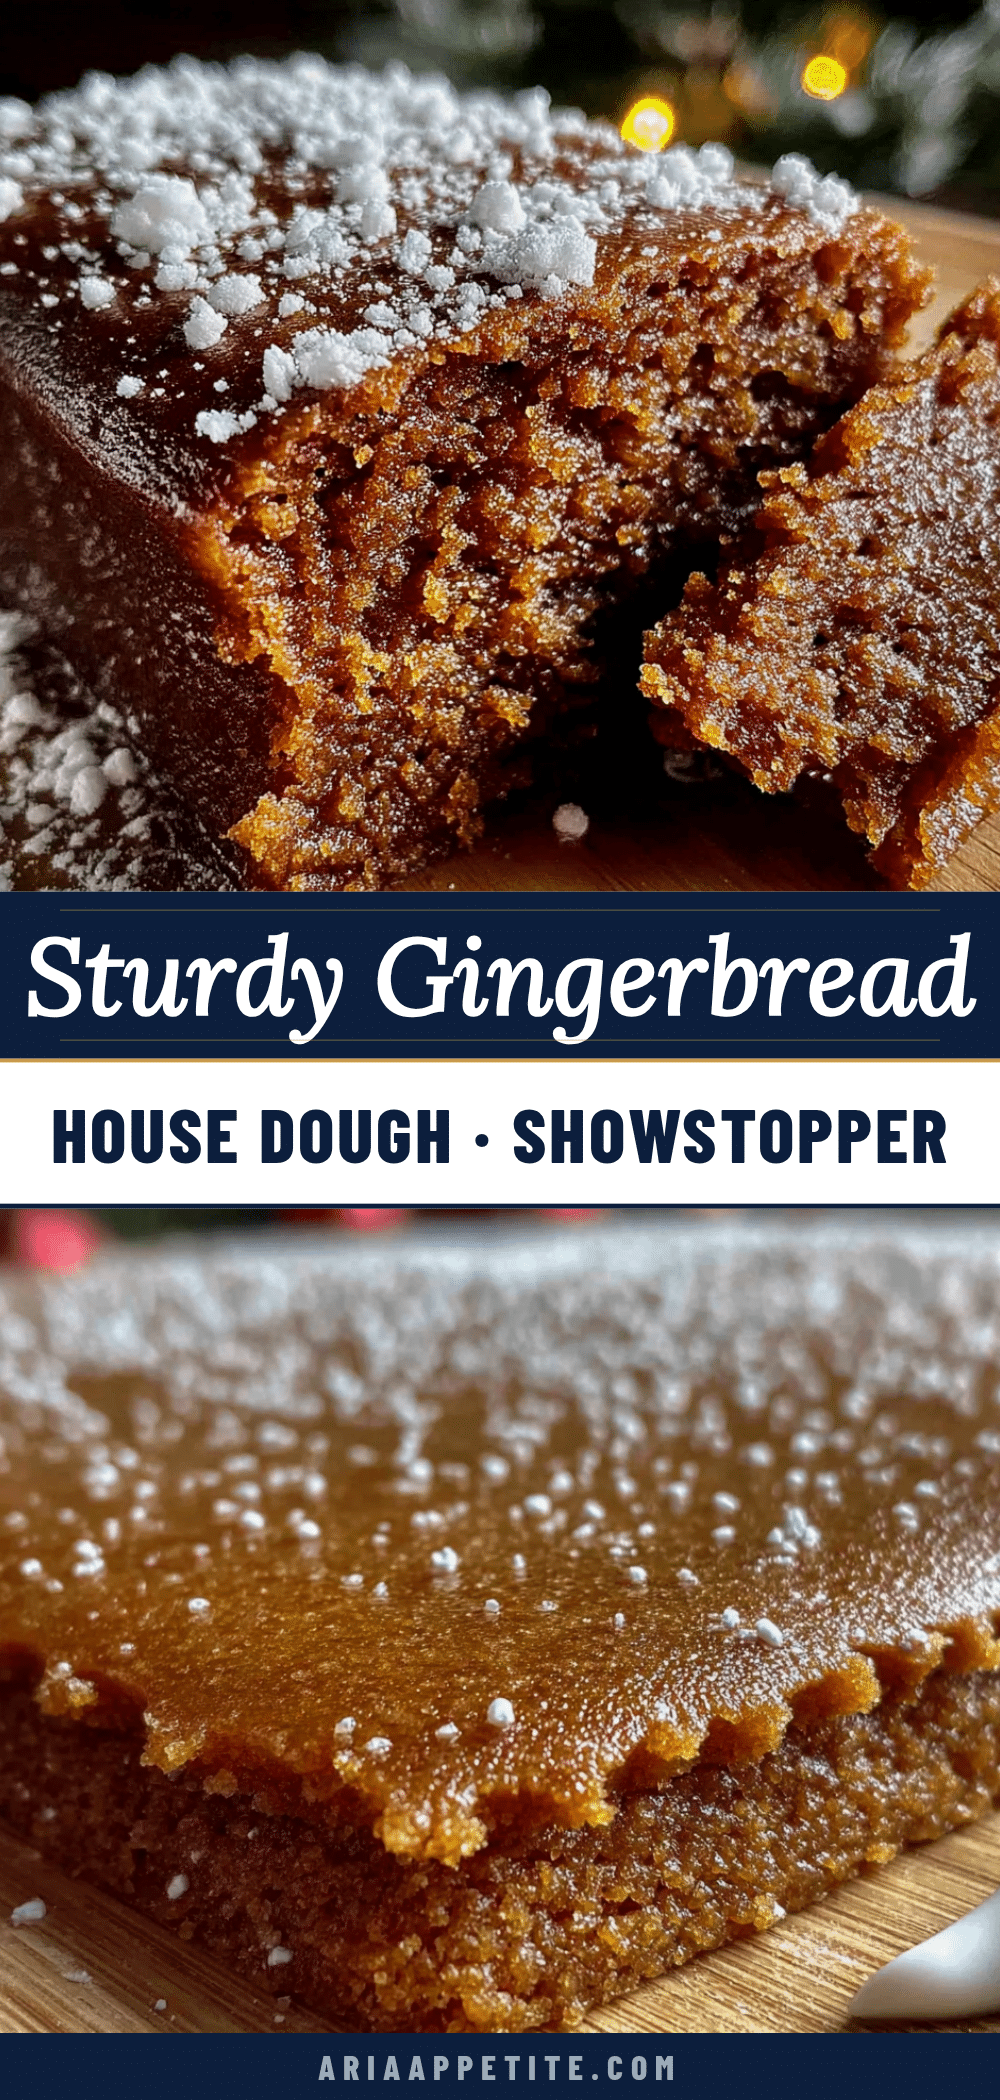
Sturdy Gingerbread House Dough: The Best Easy Recipe

This sturdy gingerbread house dough holds its shape perfectly during baking, is easy to work with, and delicious enough to eat. Perfect for holiday gatherings and decorating parties.
- Prep Time: 30 minutes
- Cook Time: 15 minutes
- Total Time: 2 hours 45 minutes (includes chilling)
- Yield: 1 gingerbread house (serves 8-10) 1x
- Category: Dessert
- Cuisine: American
Ingredients
- 4 ½ cups (560g) all-purpose flour
- 1 teaspoon baking soda
- ½ teaspoon salt
- 2 teaspoons ground ginger
- 2 teaspoons ground cinnamon
- 1 teaspoon ground cloves
- ½ teaspoon ground nutmeg
- ½ teaspoon ground cardamom (optional)
- ¾ cup (170g) unsalted butter, cold and cut into small cubes
- ¾ cup (150g) packed dark brown sugar
- 1 large egg
- ½ cup (170g) molasses (not blackstrap)
- 2 tablespoons vegetable oil
Instructions
- Combine the dry ingredients: In a large bowl, whisk together the flour, baking soda, salt, and all the spices until evenly distributed.
- Cut in the butter: Add the cold butter cubes to the flour mixture. Using a pastry cutter or your fingertips, work the butter into the flour until it resembles coarse meal with some pea-sized butter pieces remaining.
- Mix the wet ingredients: In a separate bowl, whisk together the brown sugar, egg, molasses, and vegetable oil until smooth and glossy.
- Combine wet and dry: Pour the wet mixture into the flour-butter mixture. Stir with a wooden spoon or mixer on low speed until a shaggy dough forms. Do not overmix.
- Knead and divide: Turn the dough out onto a lightly floured surface. Gently knead 3-4 times until it forms a cohesive ball. Divide into two equal portions, flatten into disks about 1 inch thick, and wrap tightly in plastic wrap.
- Chill the dough: Refrigerate for a minimum of 2 hours, preferably overnight. The dough should be firm but not rock-hard.
- Roll out the dough: Preheat oven to 350°F (175°C). On a lightly floured piece of parchment paper, roll one disk to ¼-inch (6mm) thickness for walls and ⅛-inch (3mm) for roofs and details.
- Cut the shapes: Place cardboard templates on the rolled dough and cut around them with a sharp knife or pizza cutter. Transfer to a parchment-lined baking sheet, leaving at least 1 inch of space between pieces.
- Chill again: Refrigerate the baking sheet with cut pieces for 15 minutes to prevent spreading.
- Bake: Bake walls for 12-15 minutes and thin pieces for 8-10 minutes, until edges are just beginning to darken and centers look dry. Cool on baking sheet for 5 minutes, then transfer to a cooling rack.
Notes
Chilling the dough is non-negotiable for preventing spreading. Bake pieces up to two weeks in advance and store in an airtight container. For best results, use a kitchen scale to measure flour. Let pieces dry completely before assembling.
Nutrition
- Serving Size: 1 wall piece (about
- Calories: 120
- Sugar: 8
- Sodium: 120
- Fat: 4
- Saturated Fat: 2.5
- Carbohydrates: 20
- Fiber: 0.5
- Protein: 2
Keywords: gingerbread house, gingerbread dough, holiday baking, Christmas, sturdy gingerbread, gingerbread recipe